Building a route and setting alarm limits#
Two jobs an engineer sets up once: a repeatable inspection round, and limits that fire only when they should.
This is a recipe for an engineer or admin standing up a site. Part 1 builds a route — the inspection round your team walks. Part 2 sets the alarm rules — the limits that decide when a reading is worth someone’s attention. Do both well and the two halves of Mechbase reinforce each other: a measurement check on a route feeds the same trend an alarm rule watches, so a manual reading and an automatic one are judged against exactly the same limits.
The short version#
Two jobs, done once. Part 1: open Routes, create a route, and fill its checklist with the stops (zones or assets) you’ll visit and the checks at each. Part 2: open each measurement point’s Alarm rules and either lean on the default or create an override with Warning and Critical limits. Then leave both to settle over a short learning period and trim the limits against what you actually see.
You’ll need the assets and their measurement points already in place (Working with assets). For the full detail behind each half, see Inspections and routes and Measurements, trends, and alarms — this chapter is the condensed how-to.
Build the route#
A route is a named list of things to check, in a sensible walking order. You build it once; every walk-through creates a run against it.
Create it#
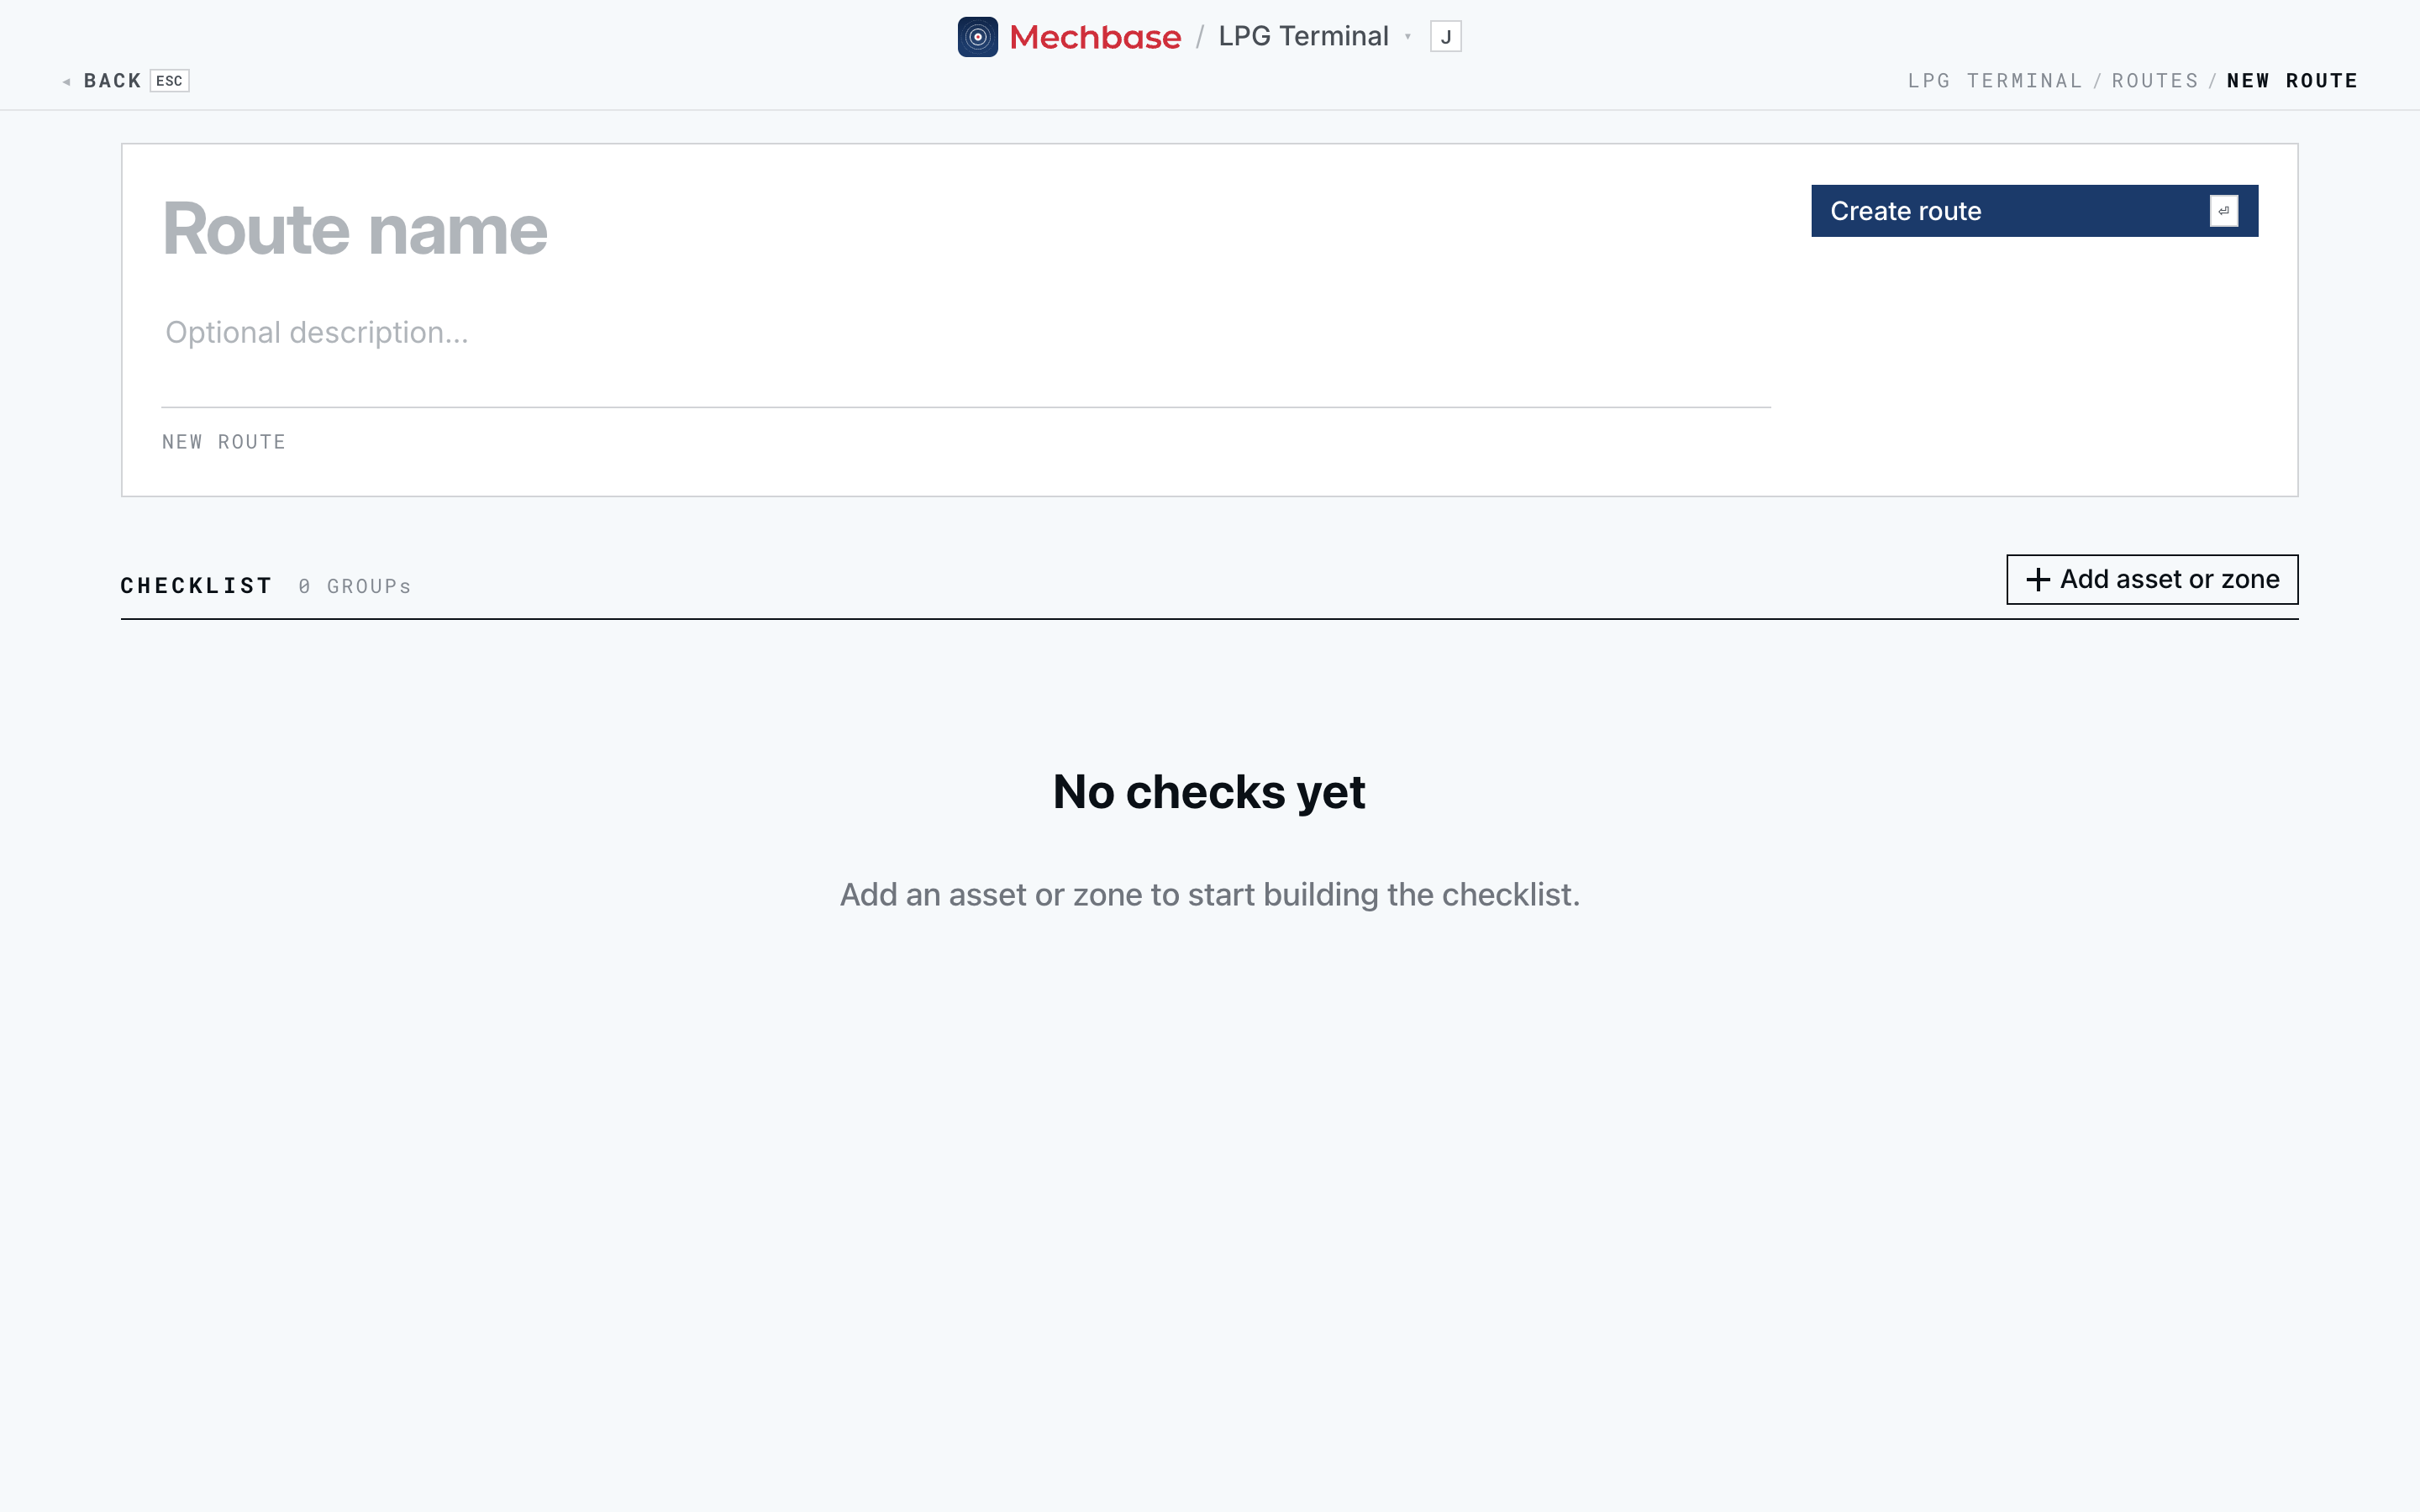
Open Routes (press 2), click New Route (N), give it a Route name and an optional description, then click Create route.
Add stops and checks#
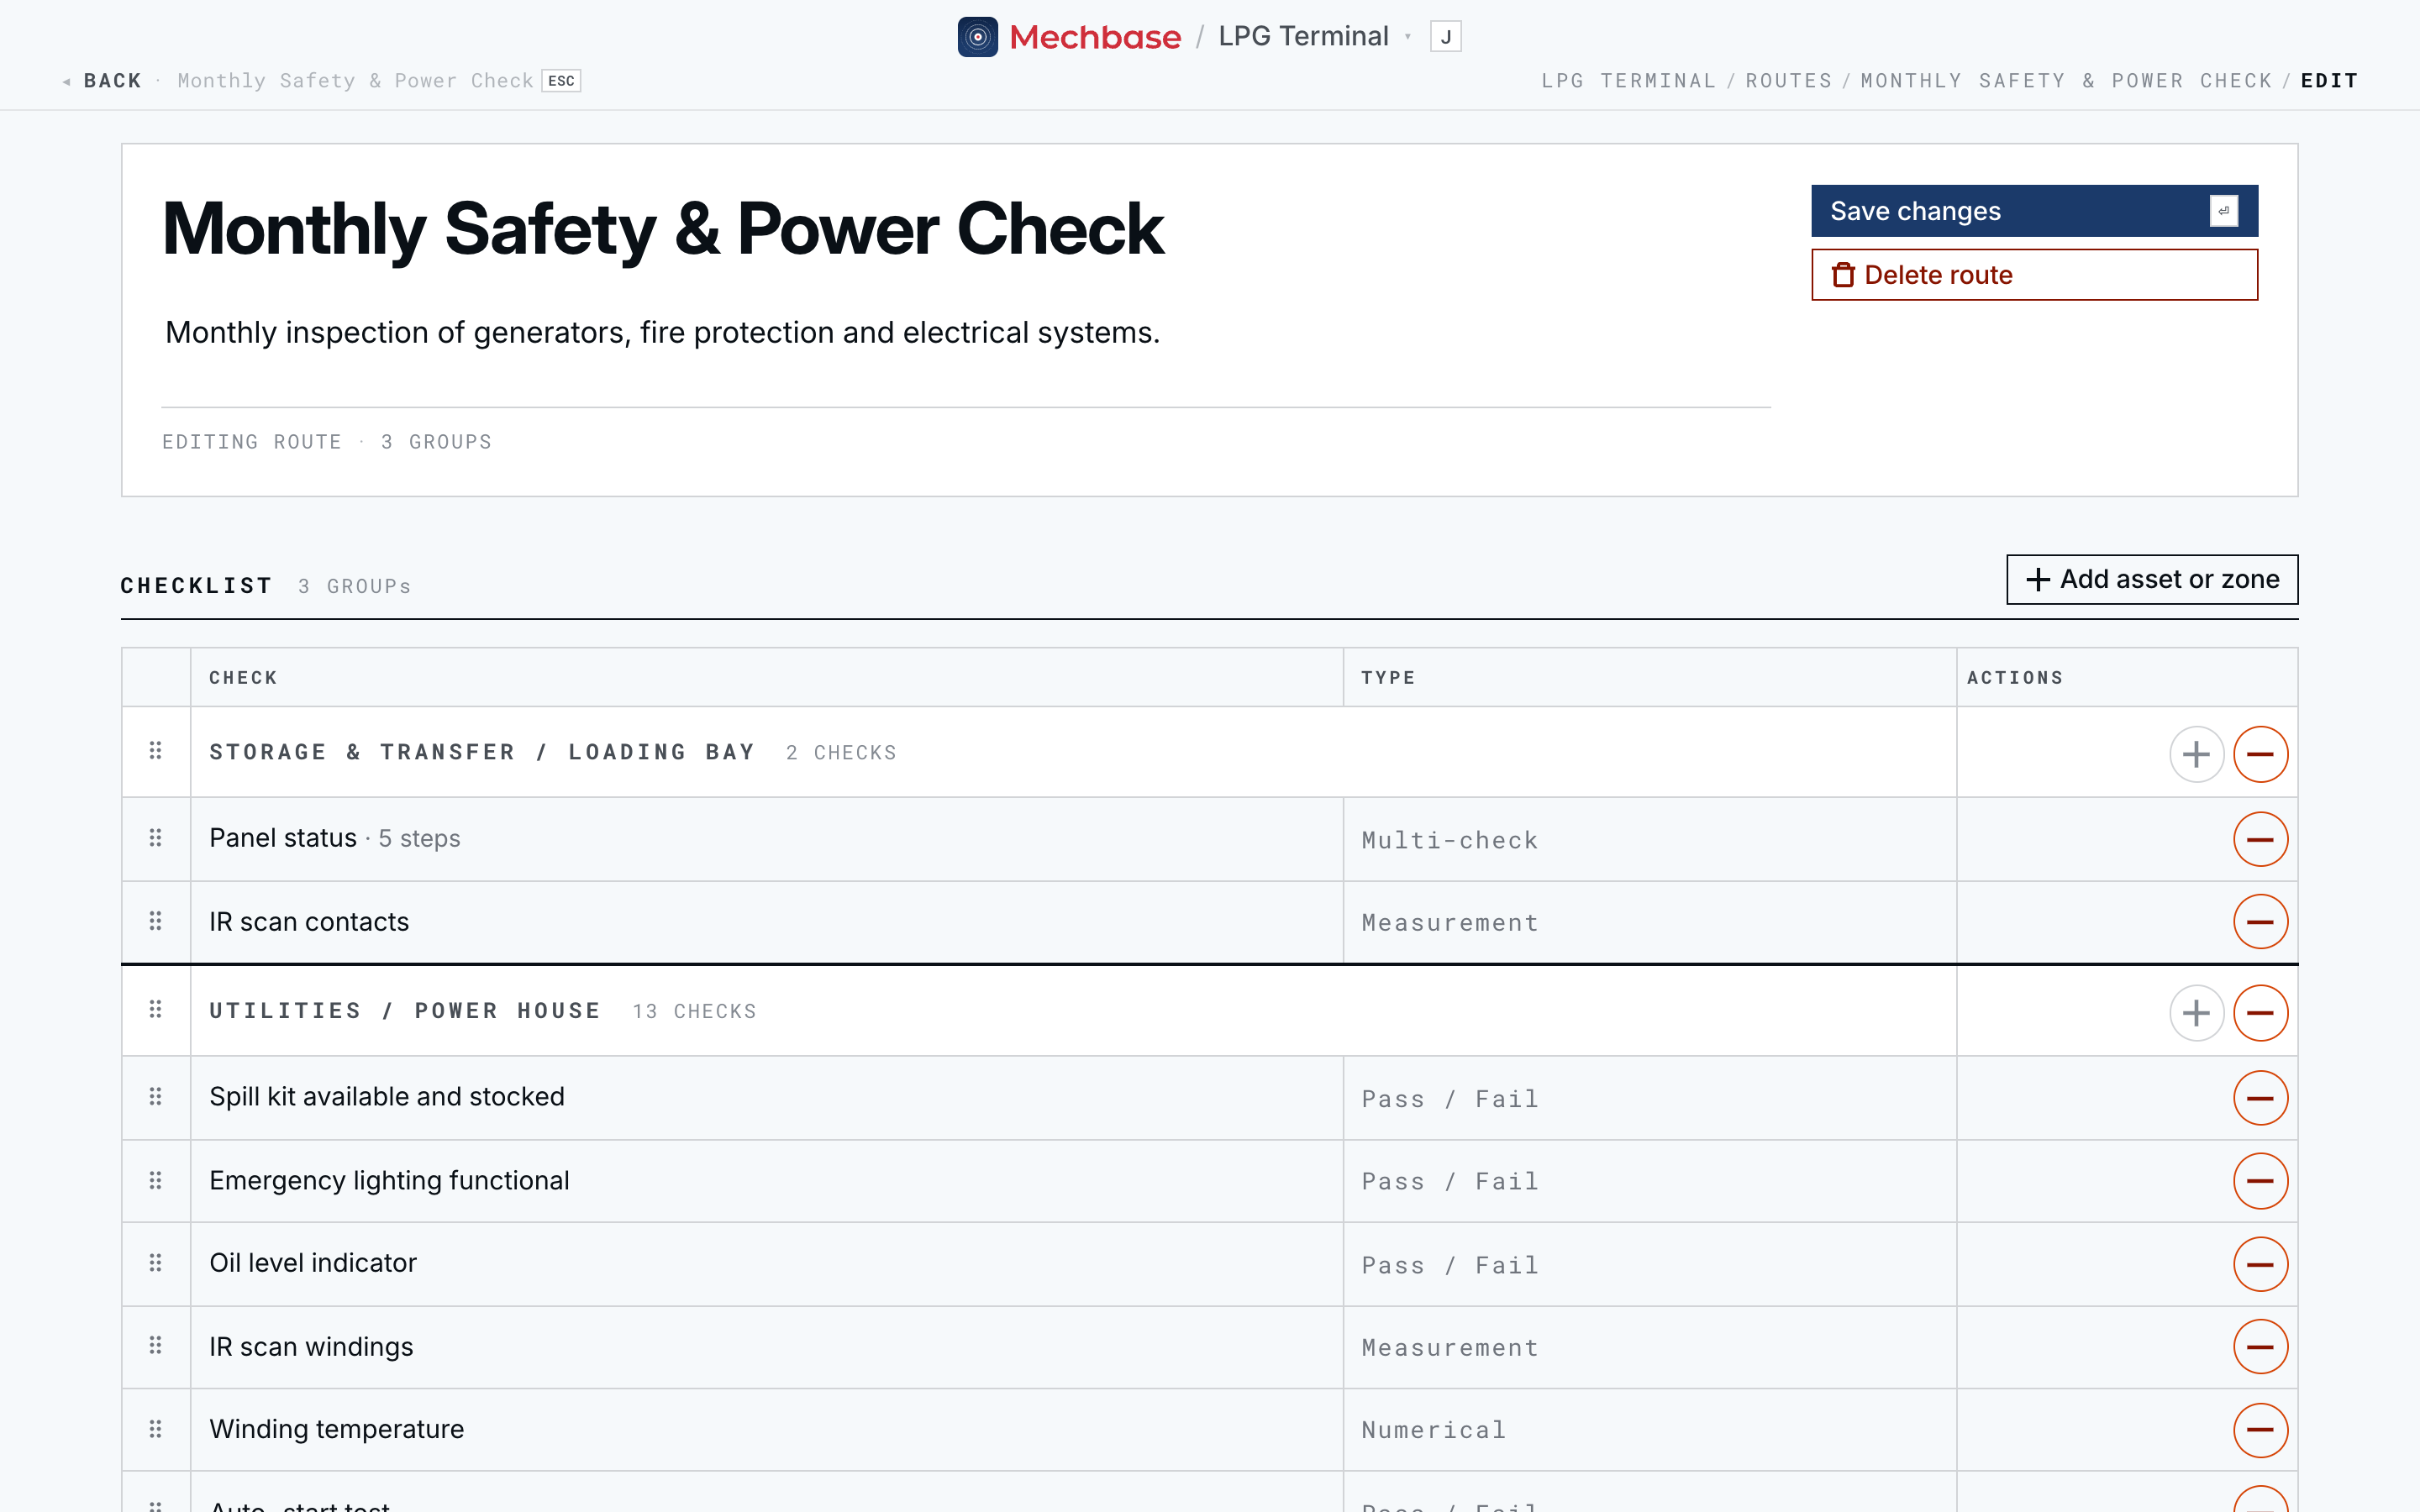
A new route starts empty. Click Add asset or zone and pick the first stop — a whole zone, or a single asset. Add the rest the same way. Then, on each stop, click + to Add check, give it a Label, and choose its Type:
Pass / Fail — a yes/no judgement, like “fire extinguisher in date”.
Numerical — a number read off a gauge, in the Unit you set (bar, °C).
Multi-check — several pass/fail Steps bundled into one check (a panel’s e-stop, relays, interlocks, fan). Add each step; it becomes its own tick during the run.
Measurement — a reading on one of the asset’s measurement points; pick the Measurement point. It flows into that point’s trend like an automatic reading, and is scored against the same alarm rule you set in Part 2. Thermal images and vibration captures are Measurement checks on thermography and vibration points.
A check’s type can’t be changed once it’s created, so pick carefully.
Order it and save#
Drag the handles to reorder stops and checks so the route follows the natural walking path of the plant (or use Move to different zone or asset), then click Save changes. The route’s page shows its totals — stops, checks, and runs — and, until it’s first walked, its Checklist. From here Start route (R) walks it, Latest report (L) opens the most recent result, and History (H) shows every run.
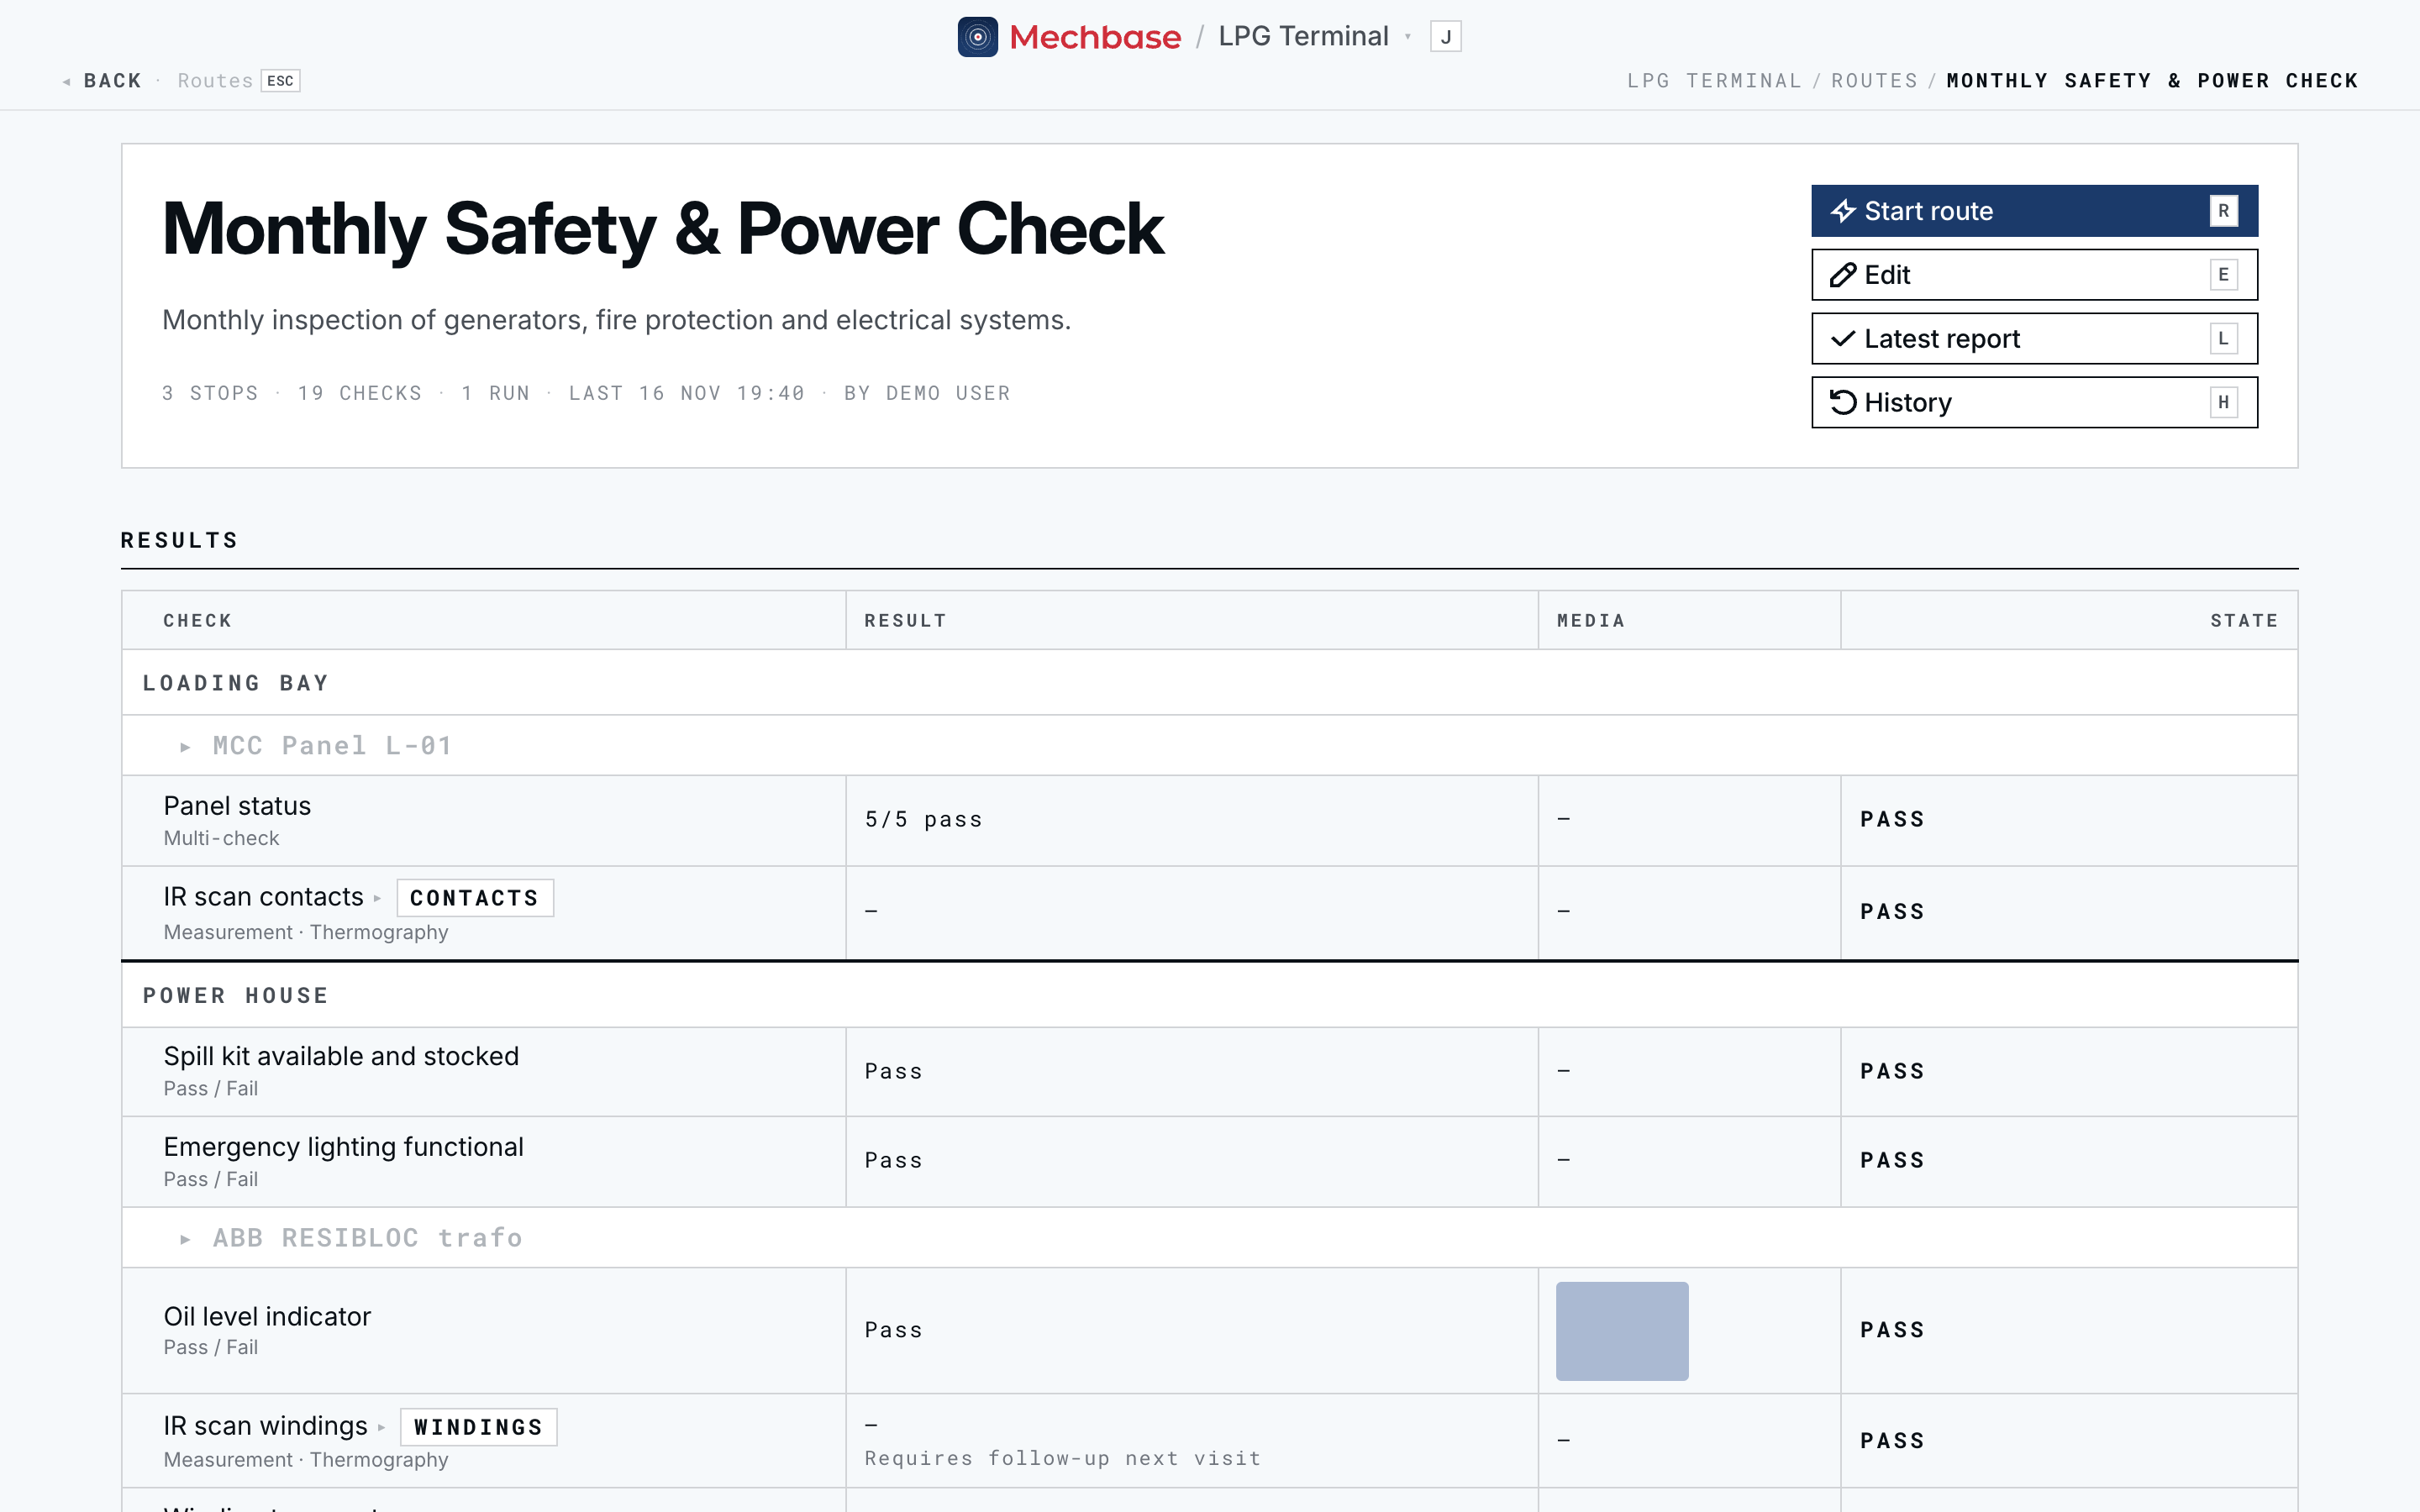
Tip: Order the stops the way someone actually walks the site, and keep each check’s name short and unambiguous — it’s what the technician reads on their phone at 6 a.m. Put how to take a reading in the measurement point’s Instructions: they’re shown on the check.
Tip: Don’t know the route yet? Walk it once as a New Survey, adding checks as you go — it becomes a normal route when you complete it.
Set the alarm limits#
Alarms are what make Needs attention mean something. They’re defined by alarm rules: an installation default per measurement type (and the ISO 10816 default for vibration), maintained centrally, and a point override for the cases where one point should behave differently.
See what’s in effect#
Open a measurement point and click Alarm rules. The line at the top tells you where the rule comes from — Point override, ISO … default, Installation default, or No rule configured — and what it says.
Override one point#
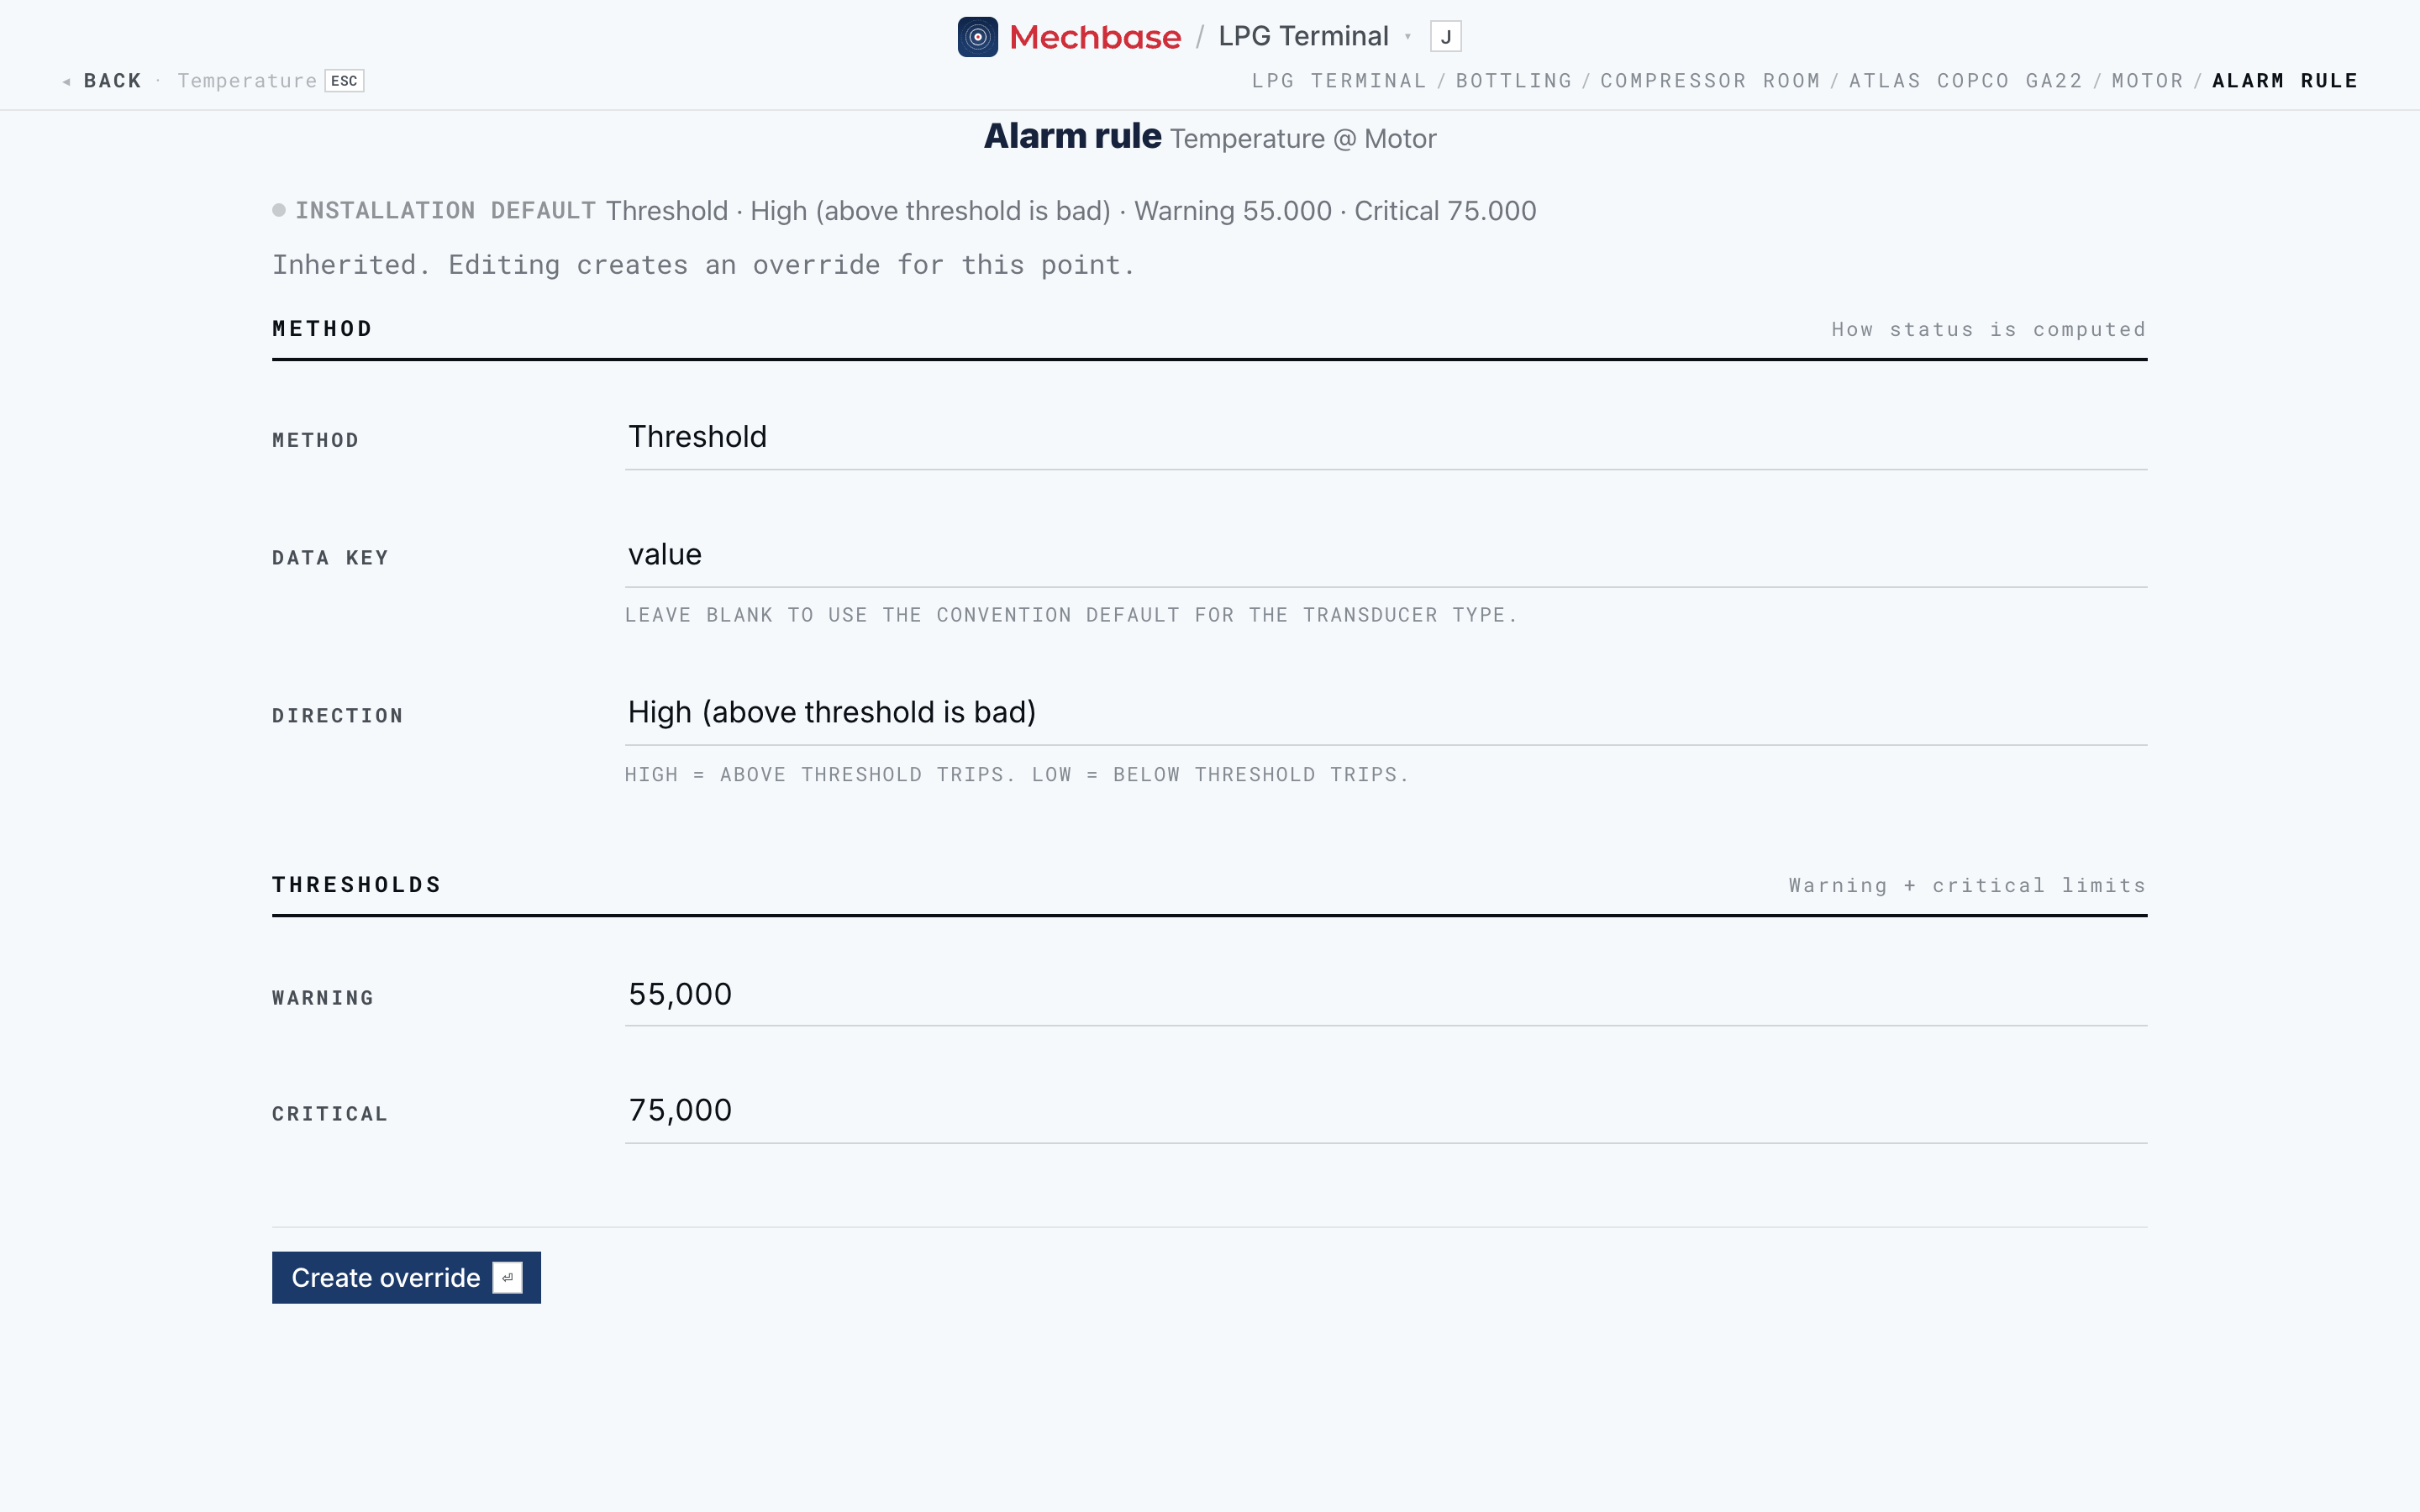
When the point is inheriting a rule, the form below is already filled in with it — “Inherited. Editing creates an override for this point.” Adjust it:
Method — how the status is worked out. Threshold (a simple limit on the value — the common case), Narrowband Envelope (watches a specific frequency band for a particular vibration fault), or Maintenance due (raises a status on time or usage).
Data key — which value to watch; leave it blank for the usual one.
Direction — High (above the threshold is bad: temperature, vibration) or Low (below is bad: a flow or pressure that shouldn’t drop).
Thresholds — the Warning and Critical limits.
Click Create override (or Create rule where no default applies). The new limits appear immediately on the point’s trend. Remove override at the bottom puts the point back on the default, with an Undo in case you didn’t mean it.
Tip: Base your limits on history and judgement, not a guess. Each chart on the point page shows its normal band — the middle 80% of its running readings over the previous 30 days — and a reading’s page compares it with the limit, the previous reading, and that band. Set warning and critical limits that sit clearly above (or below) normal.
Bearings: alarm on the defect bands#
For a vibration point on a rolling-element bearing, go further. Assign the Bearing on the point’s Edit page (Shaft & bearing), then on Alarm rules add a Band rule under Bearing bands — Multiple of baseline is the easy start (3× for warning, 6× for critical, against a baseline learned from the first five running readings). Click Reset baseline after any bearing change or repair.
Installation defaults#
If every point of a type should behave the same — “for any temperature point, warn at 55 and go critical at 75” — that’s an installation default, not an override on every point. Defaults are maintained by your Mechbase administrator (Setting up and managing your account); ask for one when you find yourself overriding the same type again and again. With sensible defaults in place, point overrides only exist for the genuine exceptions.
Keeping false alarms down#
A route and its limits are only worth as much as people trust them. If an alarm fires every time a sensor twitches, teams stop paying attention — and the real faults get lost in the noise.
Mechbase avoids that by design: instead of tripping on a single reading that crosses a limit, it scores each reading (normal, minor, major), averages that over the last several readings, and moves the point’s state only when the average crosses a threshold. So a sustained run of off readings escalates to Warning or Critical, while a lone spike shows as Check — a soft pattern forming — and no more.
Three things shape how well that works, and all are worth reviewing during a new point’s first few weeks:
The limits — from history and expertise, as above.
How many recent readings are averaged — a longer window is steadier but slower to react; a shorter one reacts faster but tolerates less noise.
The baseline — for relative and bearing-band rules, what “normal” means for this machine. If the first weeks of data were unrepresentative (a bad bearing, a misaligned coupling since fixed), relearn it from a better date: Edit the asset, and under Baselines use Create from date….
Note: Treat the first weeks on a new point as a learning period. Watch the trend, see where the value really sits, and trim the limits until warnings land on real problems and nothing else. The full mechanism is in Measurements, trends, and alarms.
Quick reference#
Task |
Where |
|---|---|
New route |
Routes ( |
Route as you walk |
Routes → New Survey |
Edit a route’s checklist |
open the route → Edit ( |
Walk it · latest result · past runs |
Start route ( |
Check types |
Pass / Fail · Numerical · Multi-check · Measurement |
See a point’s alarm rule |
open the point → Alarm rules |
Per-point limits |
adjust the prefilled form → Create override |
Back to the default |
Remove override (with Undo) |
Alarm methods |
Threshold · Narrowband Envelope · Maintenance due |
Direction |
High (above is bad) · Low (below is bad) |
Thresholds |
Warning · Critical |
Bearing defect alarms |
assign the bearing on Edit → Bearing bands → Band rule |
Relearn a baseline |
asset Edit → Baselines → Create from date… |
Installation-wide default |
your Mechbase administrator — Setting up and managing your account |