Running an inspection route#
A start-to-finish recipe for the technician walking the round — on the phone, where it’s normally done.
Routes are built to be walked on your phone. You open the Mechbase app at the machine, pick the route from the home hub, work down the checklist stop by stop, and capture a photo, a reading, or a fault right where you’re standing — then it all syncs back to Mechbase on its own. This chapter runs one round start to finish on the app, the way it normally happens, and closes with the web path for running, reviewing, or completing a route from a desk. It’s the hands-on companion to Inspections and routes, which covers what a route is and how to build one.
The short version#
Open the app, pick your route from the home hub, and start walking. You get the checklist, grouped by stop, with a progress count. Tap each check to record it — a Pass / Fail, a Numerical reading, a Multi-check, or a Measurement (by hand, or straight off a thermal camera or vibration sensor) — and attach a photo and notes as you go. Fail a check and you grade it Minor or Major, which becomes a Warning or Critical non-conformity on the asset. It all works with no signal, saving to the phone first, then syncing back to Mechbase automatically once you’re online. Tap ✓ to complete, and the run is saved as an inspection report anyone can open later.
The rest of this chapter walks each step on the phone, then shows how to do the same on the web.
Get the app and open your route#
Install the Mechbase app on your phone or tablet and sign in with the same email and password you use on the web — there’s no separate mobile account, and your site access comes with you. More on the apps in Mechbase on your phone.
You land on the home hub — your base on the phone. Your inspection routes are listed at the top, ready to walk (a dot marks one already in progress), with the plant’s sections below and a status line under the site name telling you how fresh your data is. Tap your route to open it.
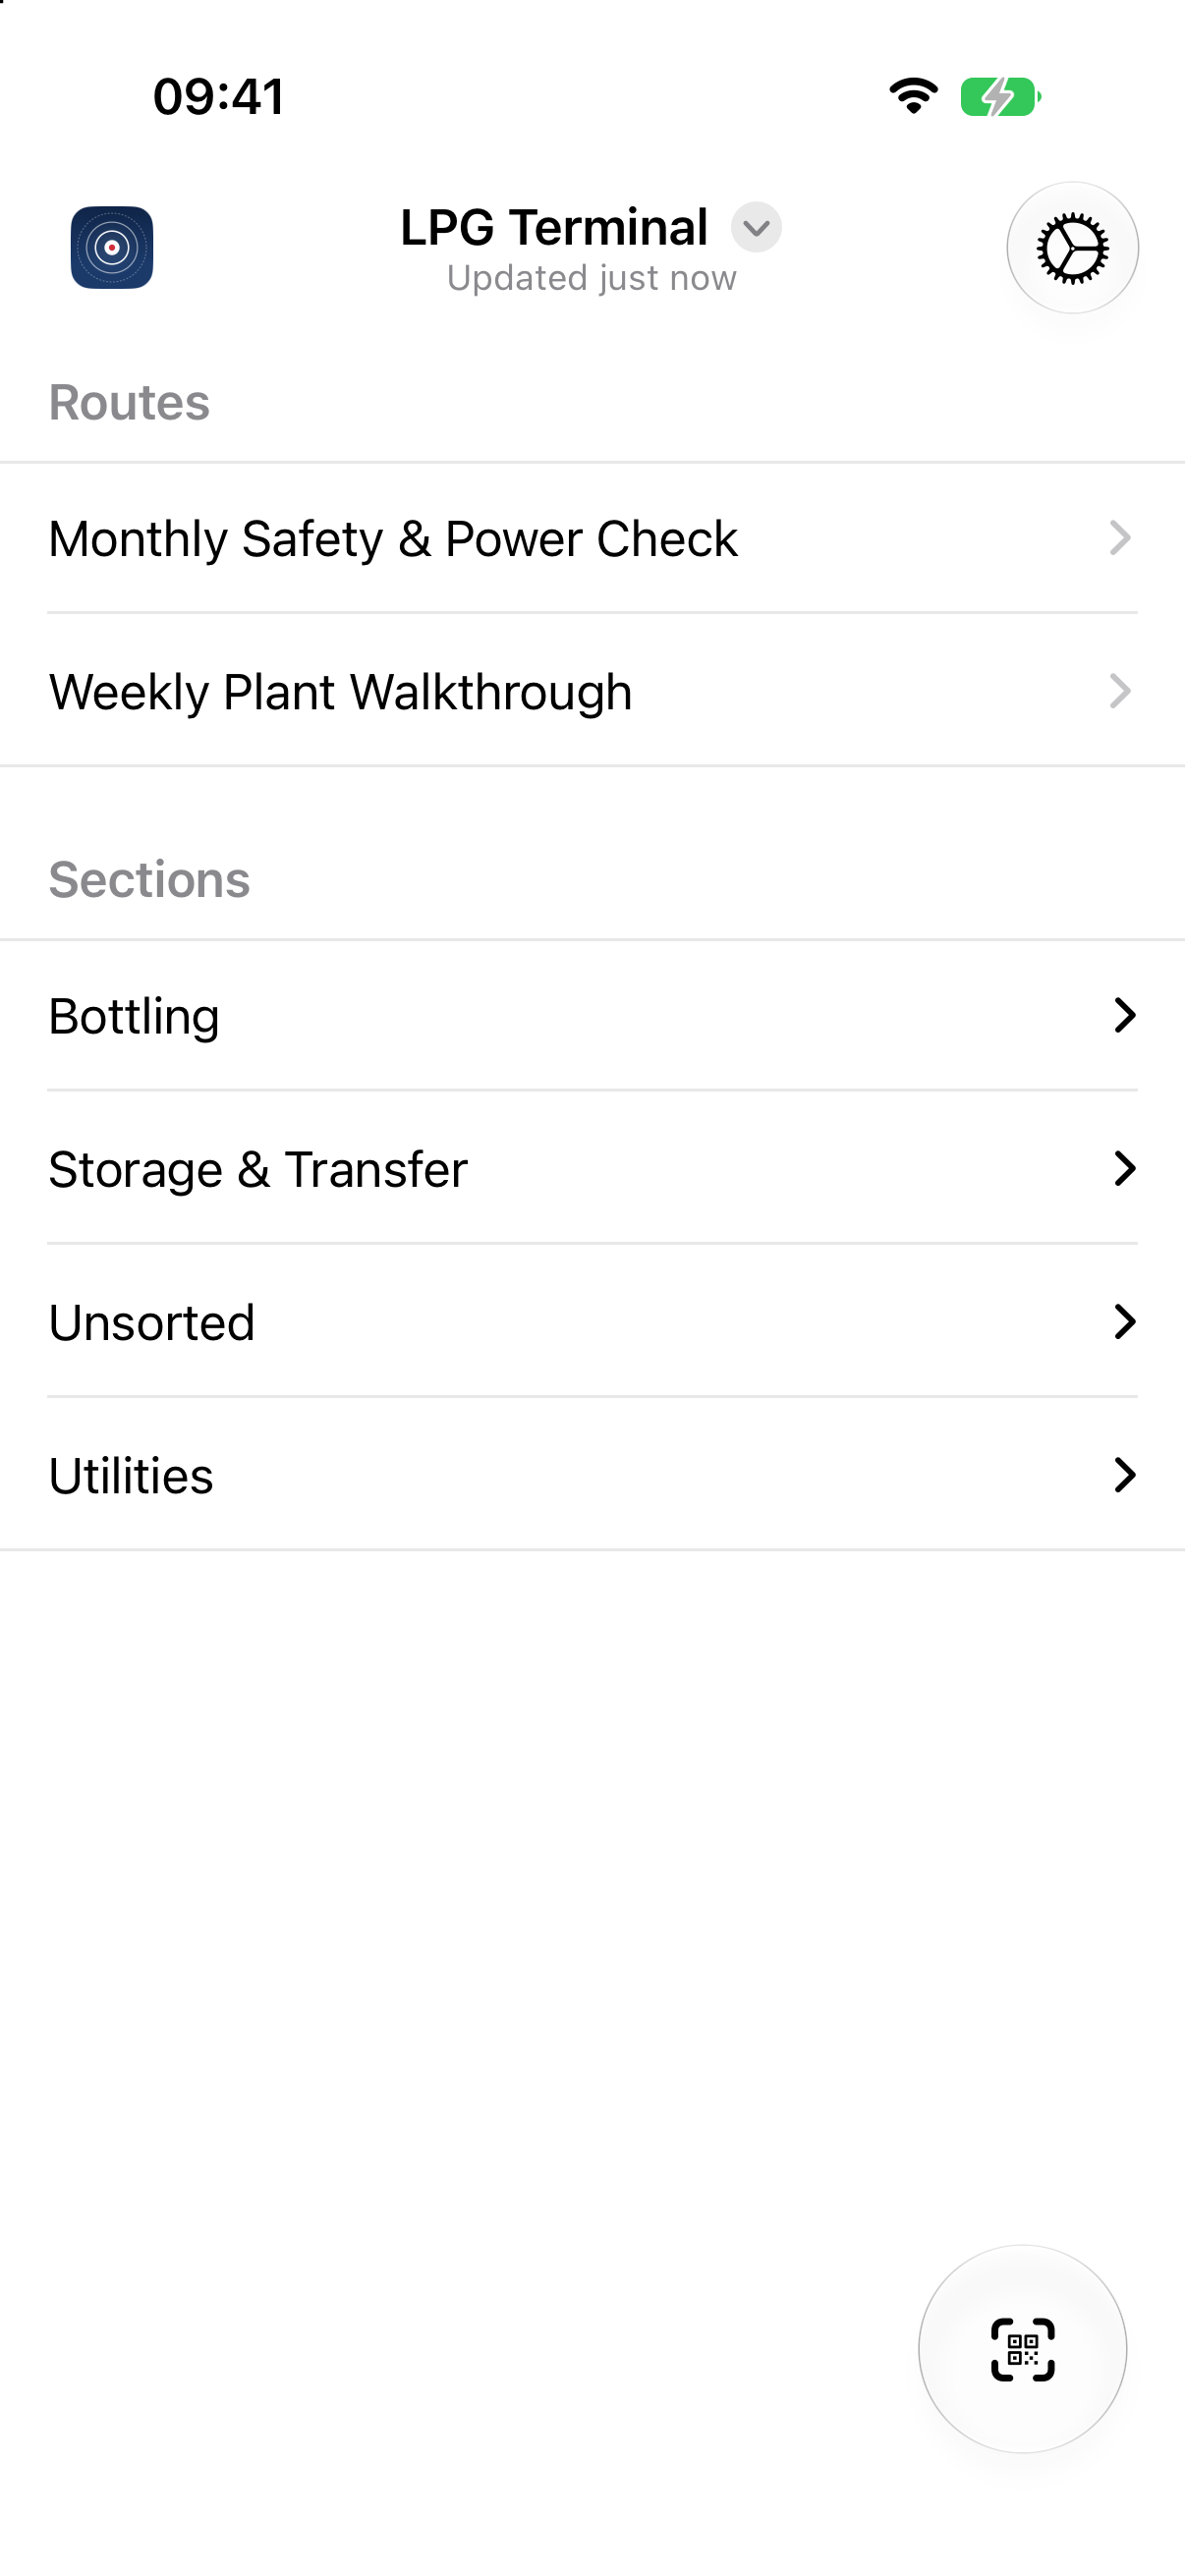
Tip: Standing in front of the equipment? Scan its QR tag from the home hub to jump straight to the asset or measurement point — and if you’re already in a route that includes it, straight to its check.
Start or join the run#
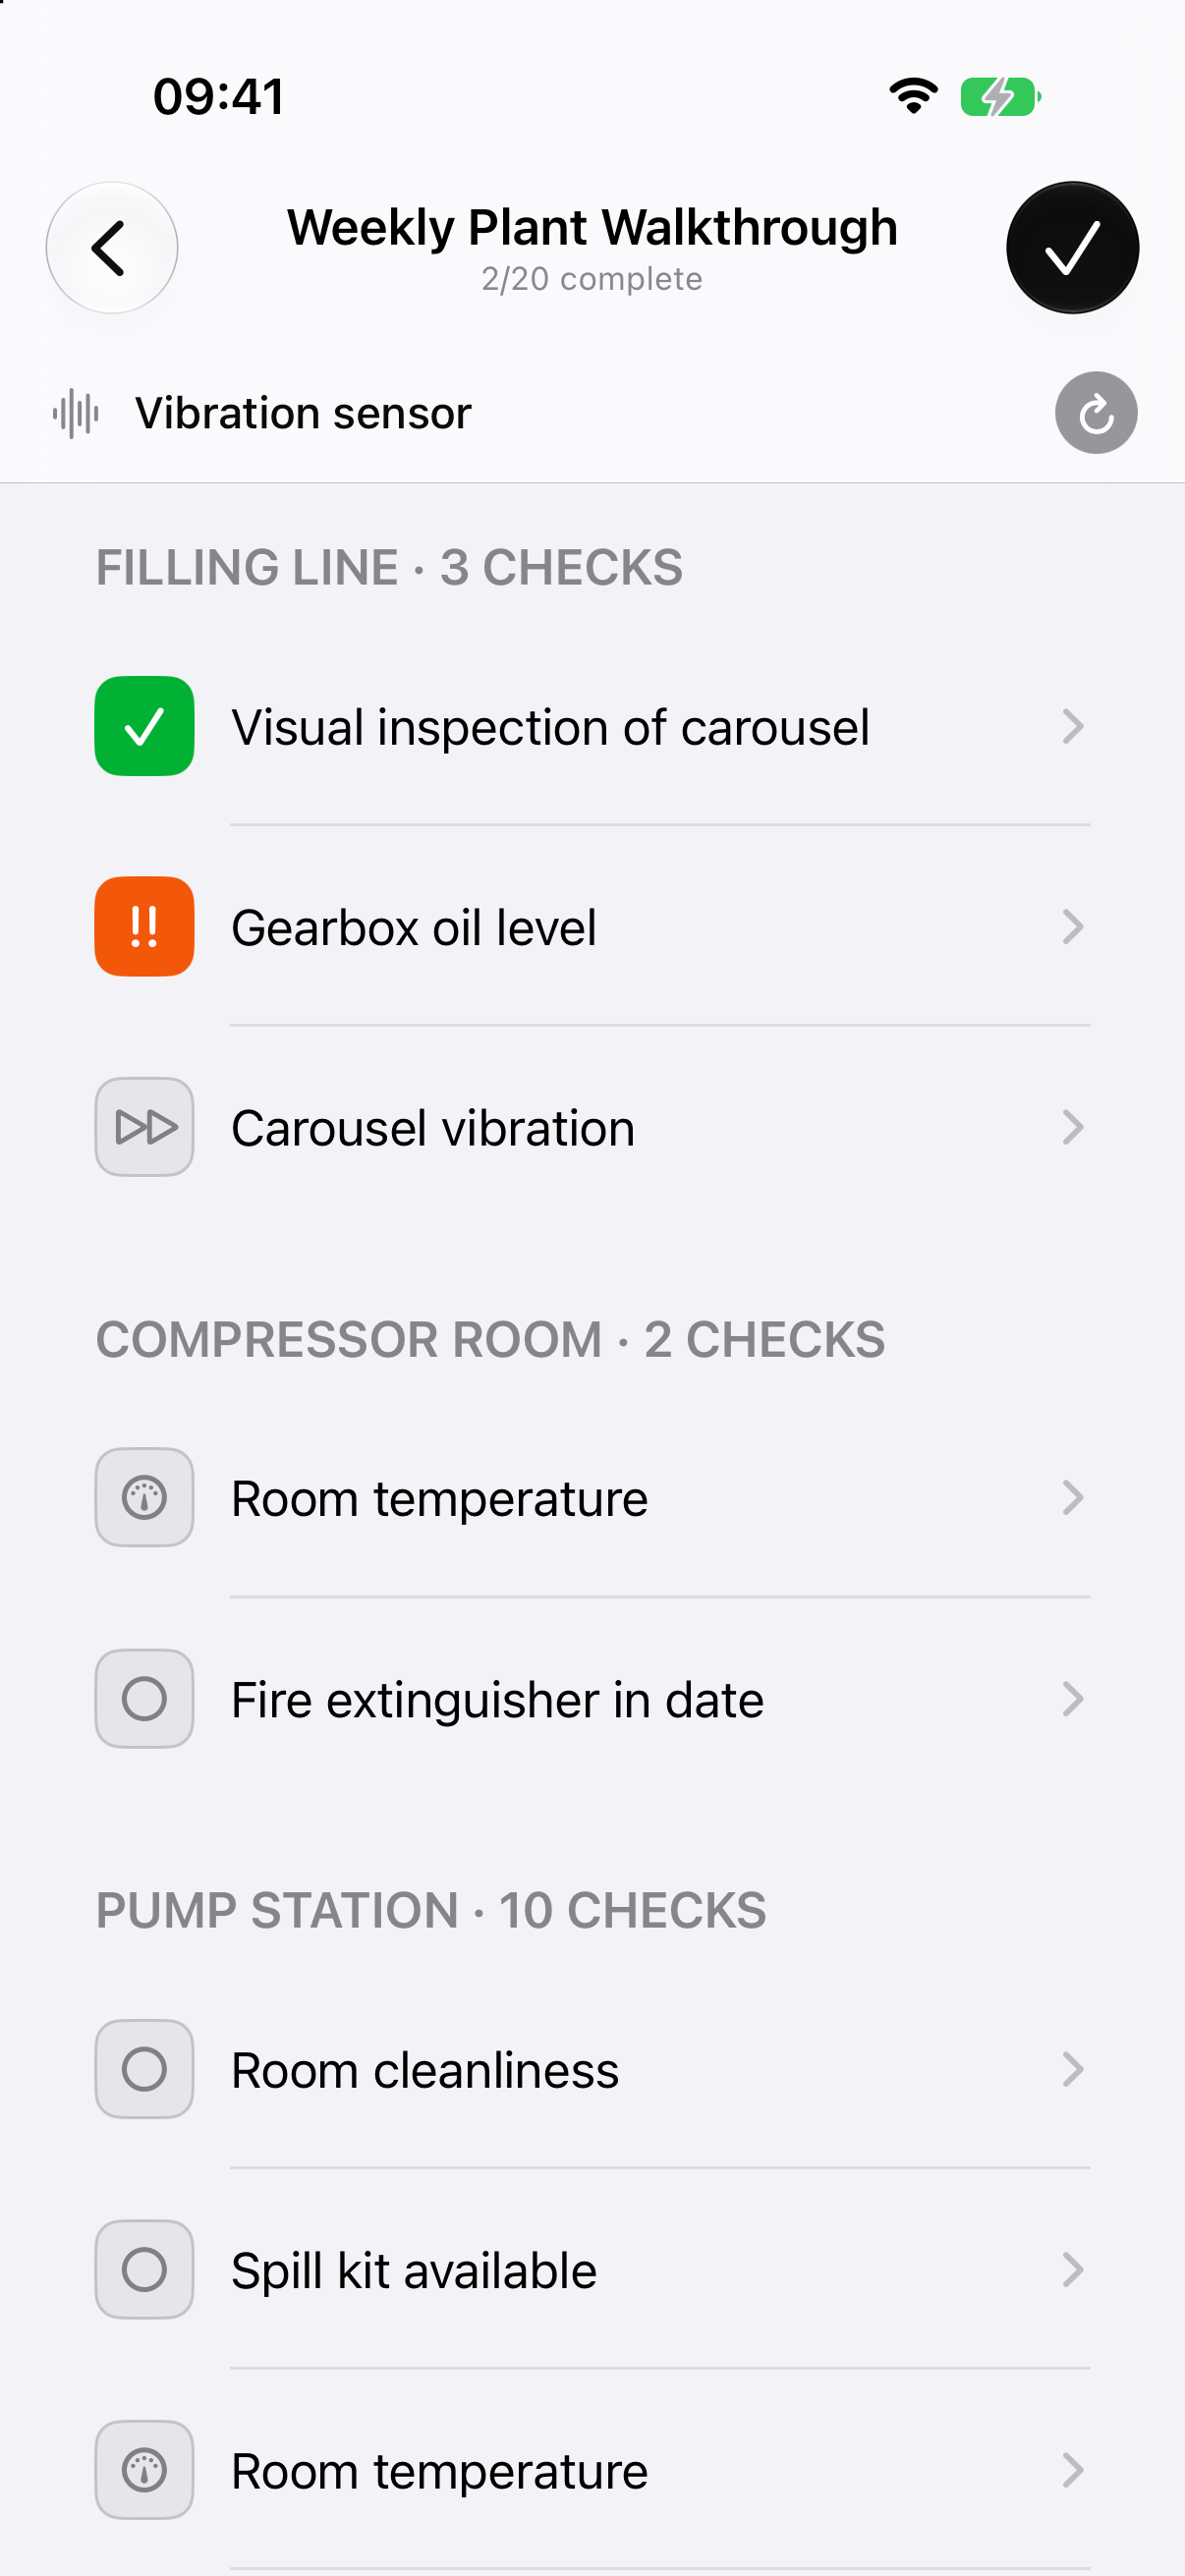
Opening the route shows its checklist, grouped by stop, with a count of how many checks are done. If nobody has started it, you start a fresh run; if a colleague already has one going, you join it — a route only ever has one run in progress, so everyone working the same round adds to the same report.
Note: A run doesn’t have to be finished in one go. Leave it and come back later — exactly what happens when a round spans a shift or you step away. And it all works with no signal: the app keeps a local copy of your data, so you can start and walk a whole route offline and it syncs when you’re back in range.
Walk the stops#
The checklist is grouped by stop in the order someone actually walks the site. Work down it, tapping each check to open and record it. The progress strip across the top shows where you are — tap it to jump to any check. Each check’s icon on the checklist shows its result by shape once you’ve answered it: a tick for a pass, ! or ‼ for a failure, a skip mark for one you passed over.
At the bottom of each check, the centre button records it and takes you to the next one (or skips it if you haven’t answered); the arrow at the top goes back. Clear wipes an answer if you recorded something wrong — with a few seconds to Undo.
Complete each kind of check#
Tap a check and the app shows the right input for its type, plus room for a photo and notes. What you record depends on the type:
Pass / Fail — tap the tick to pass (it records and moves on in one tap), or the cross to fail. A failed one becomes a non-conformity.
Numerical — type the number you read off the gauge (a temperature, a pressure). If the check has limits, a bar shows where your value falls — OK, Watch, or Alarm — and the last reading is shown so you can sanity-check yours.
Multi-check — several pass/fail steps bundled into one check (a panel’s emergency stop, relays, interlocks, and fan). Mark each step on its own.
Measurement — take a reading on the asset’s measurement point (a vibration, a temperature, a thermal image). It flows into that point’s trend exactly like an automatic reading. On the phone you can capture this straight from a FLIR camera or a Bluetooth vibration sensor — see Capturing field readings.
If the measurement point has instructions, they’re on the check too — where to put the probe, which axis, what to compare against. Read them; they’re what make this month’s reading comparable with last month’s.
Capture photos, notes, and sensor readings#
Every check has room for evidence — attach a photo from the camera and add free-text notes in Add notes…. It’s optional on a passing check, but do it on a failing one: the photo and notes you add here become the non-conformity’s evidence, so photograph the fault while you’re standing in front of it.
The apps do one thing the web can’t — capture live sensor data at the machine. A vibration check can take a reading straight from a paired Bluetooth sensor, and a thermography check can capture frames from a FLIR thermal camera, hotspots and all. The full recipe is in Capturing field readings; sensor details are in Mechbase on your phone.
When a check fails#
When you fail a Pass / Fail check — or a failed step inside a Multi-check — grade how serious it is:
Minor (
!) — the non-conformity is raised as a Warning.Major (
‼) — it’s raised as a Critical non-conformity.
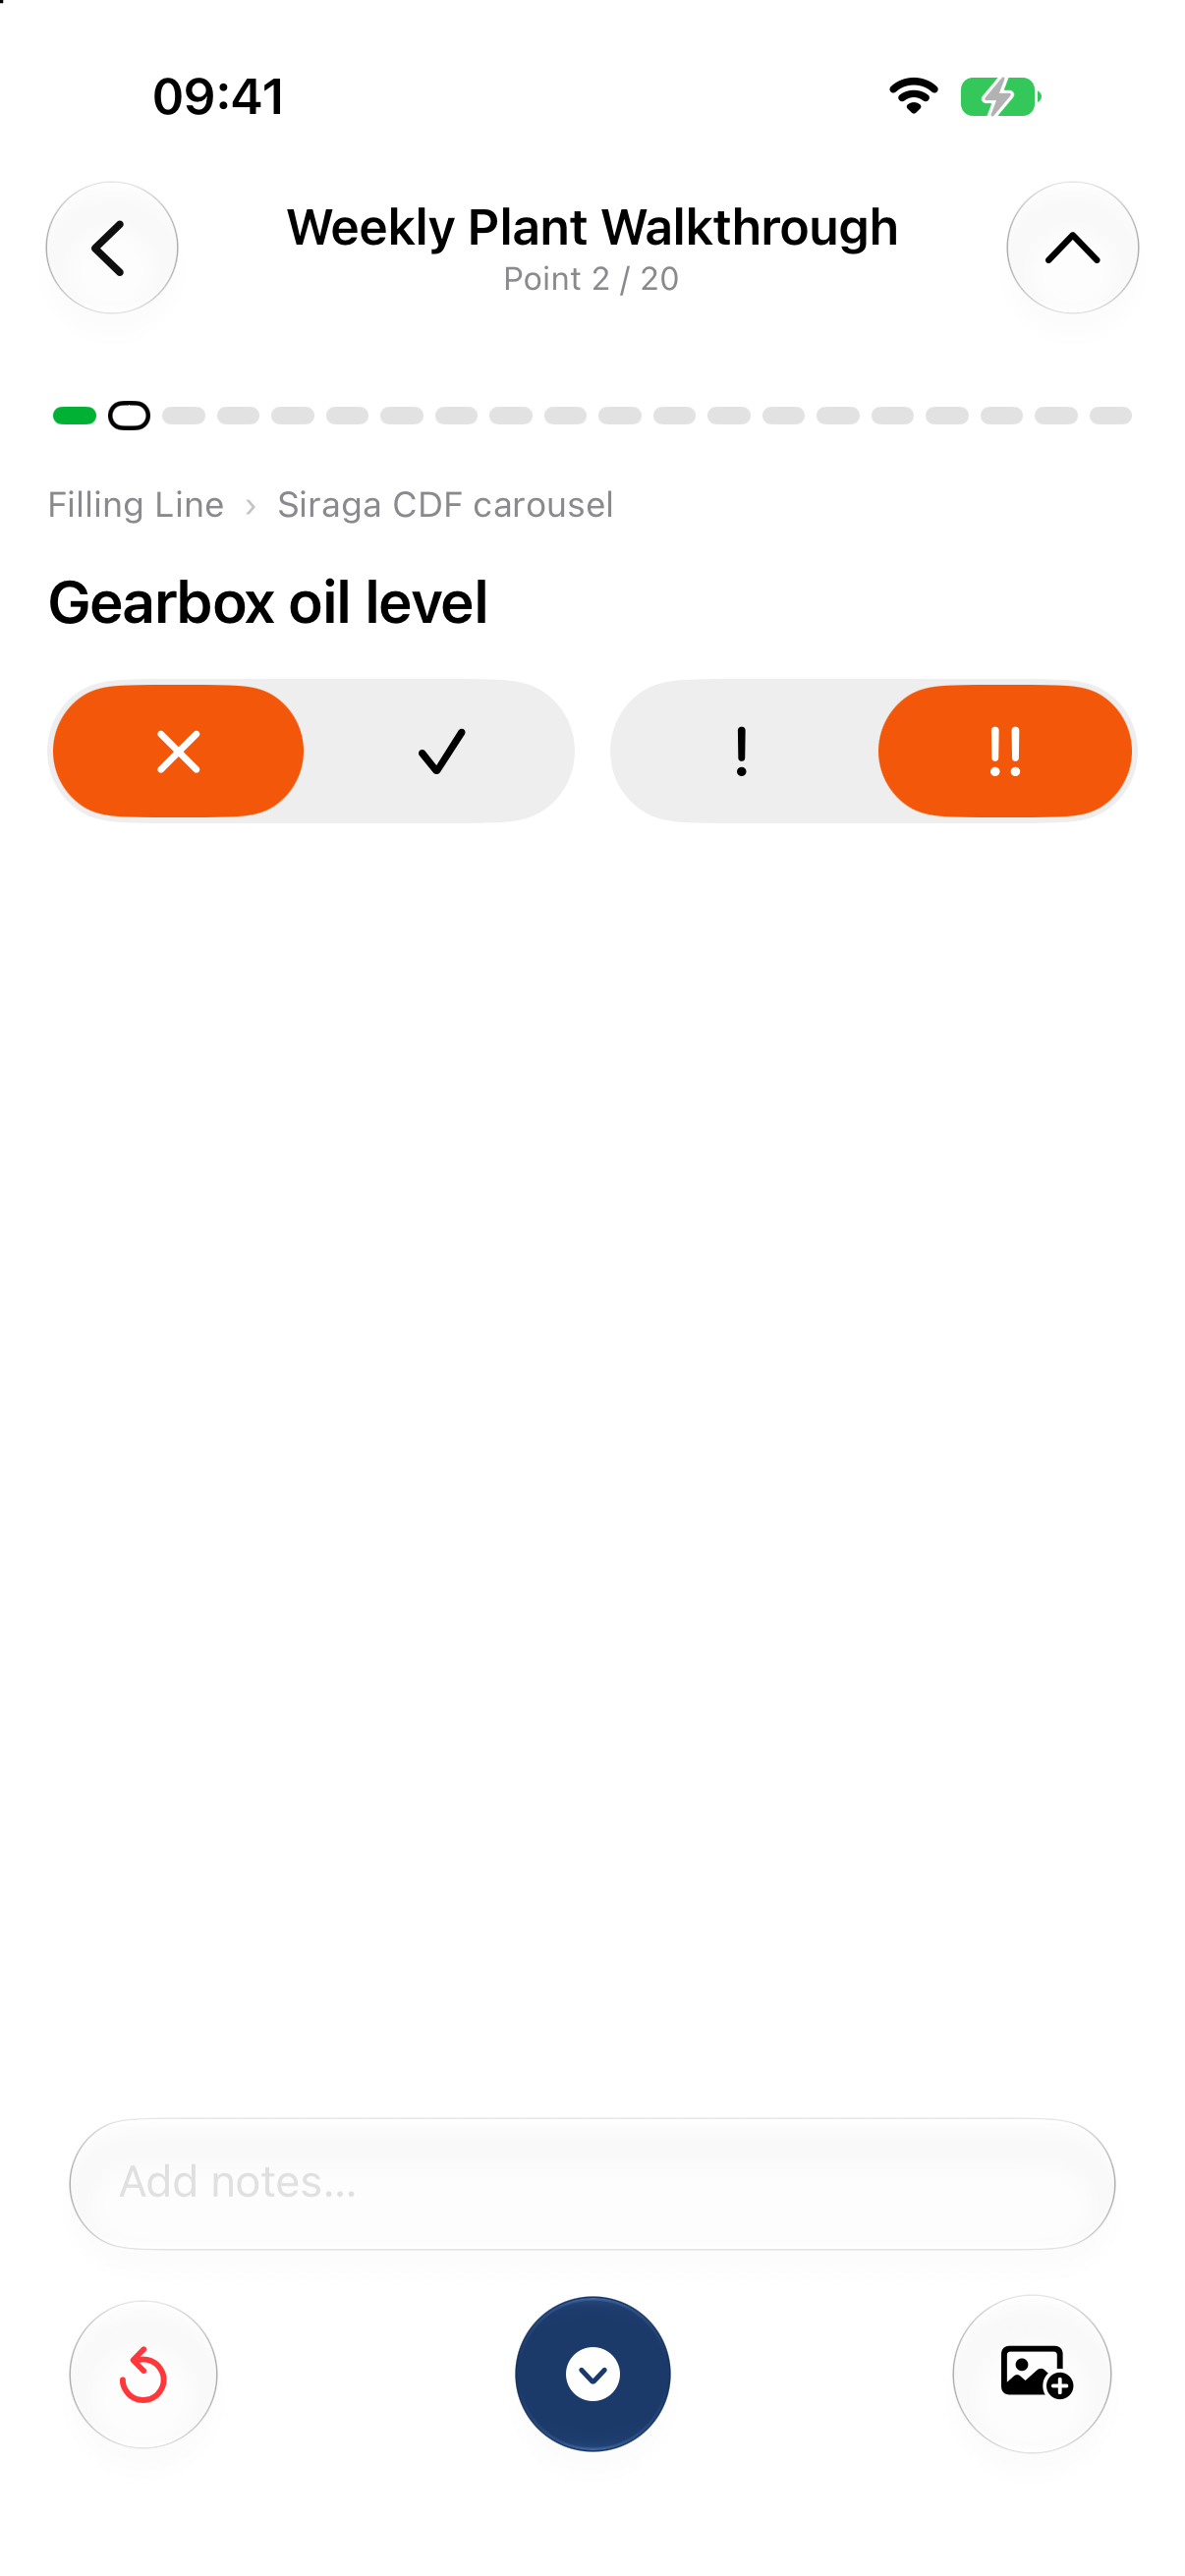
A non-conformity is just a check that didn’t pass — a failed Pass / Fail item, or a reading that breached its limits. You don’t log it separately; it’s created the moment you record a failing result, and the photo and notes on that check become its evidence.
From there it travels with the asset, not just the inspection. It’s pinned at the top of the affected asset’s Activity, raises the asset’s state, and appears on Needs attention — where your team can see it, discuss it in the asset’s notes, and clear it with Resolve once the problem is dealt with. That’s the thread from someone spotting a fault on a round to it being tracked to closure. More on the whole cycle in Inspections and routes.
Finish the run and sync#
When you’ve worked through the list, tap the ✓ at the top right of the checklist to complete the run. You don’t have to answer every check — skipped ones are simply left unanswered (and can be filled in later with Amend on the web).
Everything you recorded offline — results, readings, photos, and sensor captures — saves to the device first, then syncs back to Mechbase automatically once you’re online again, in the background. The home hub’s status line tells you where things stand, and pulling down on it forces a sync.
Heads-up: Signing out deletes anything on the device that hasn’t uploaded yet — the app warns you before it does. On a shared field phone or tablet, let a walked route sync before you sign out.
Open the inspection report#
Every completed run is saved as a report, which anyone can open on the web — from the route’s Latest report (L) or History (H), or from the activity feed.
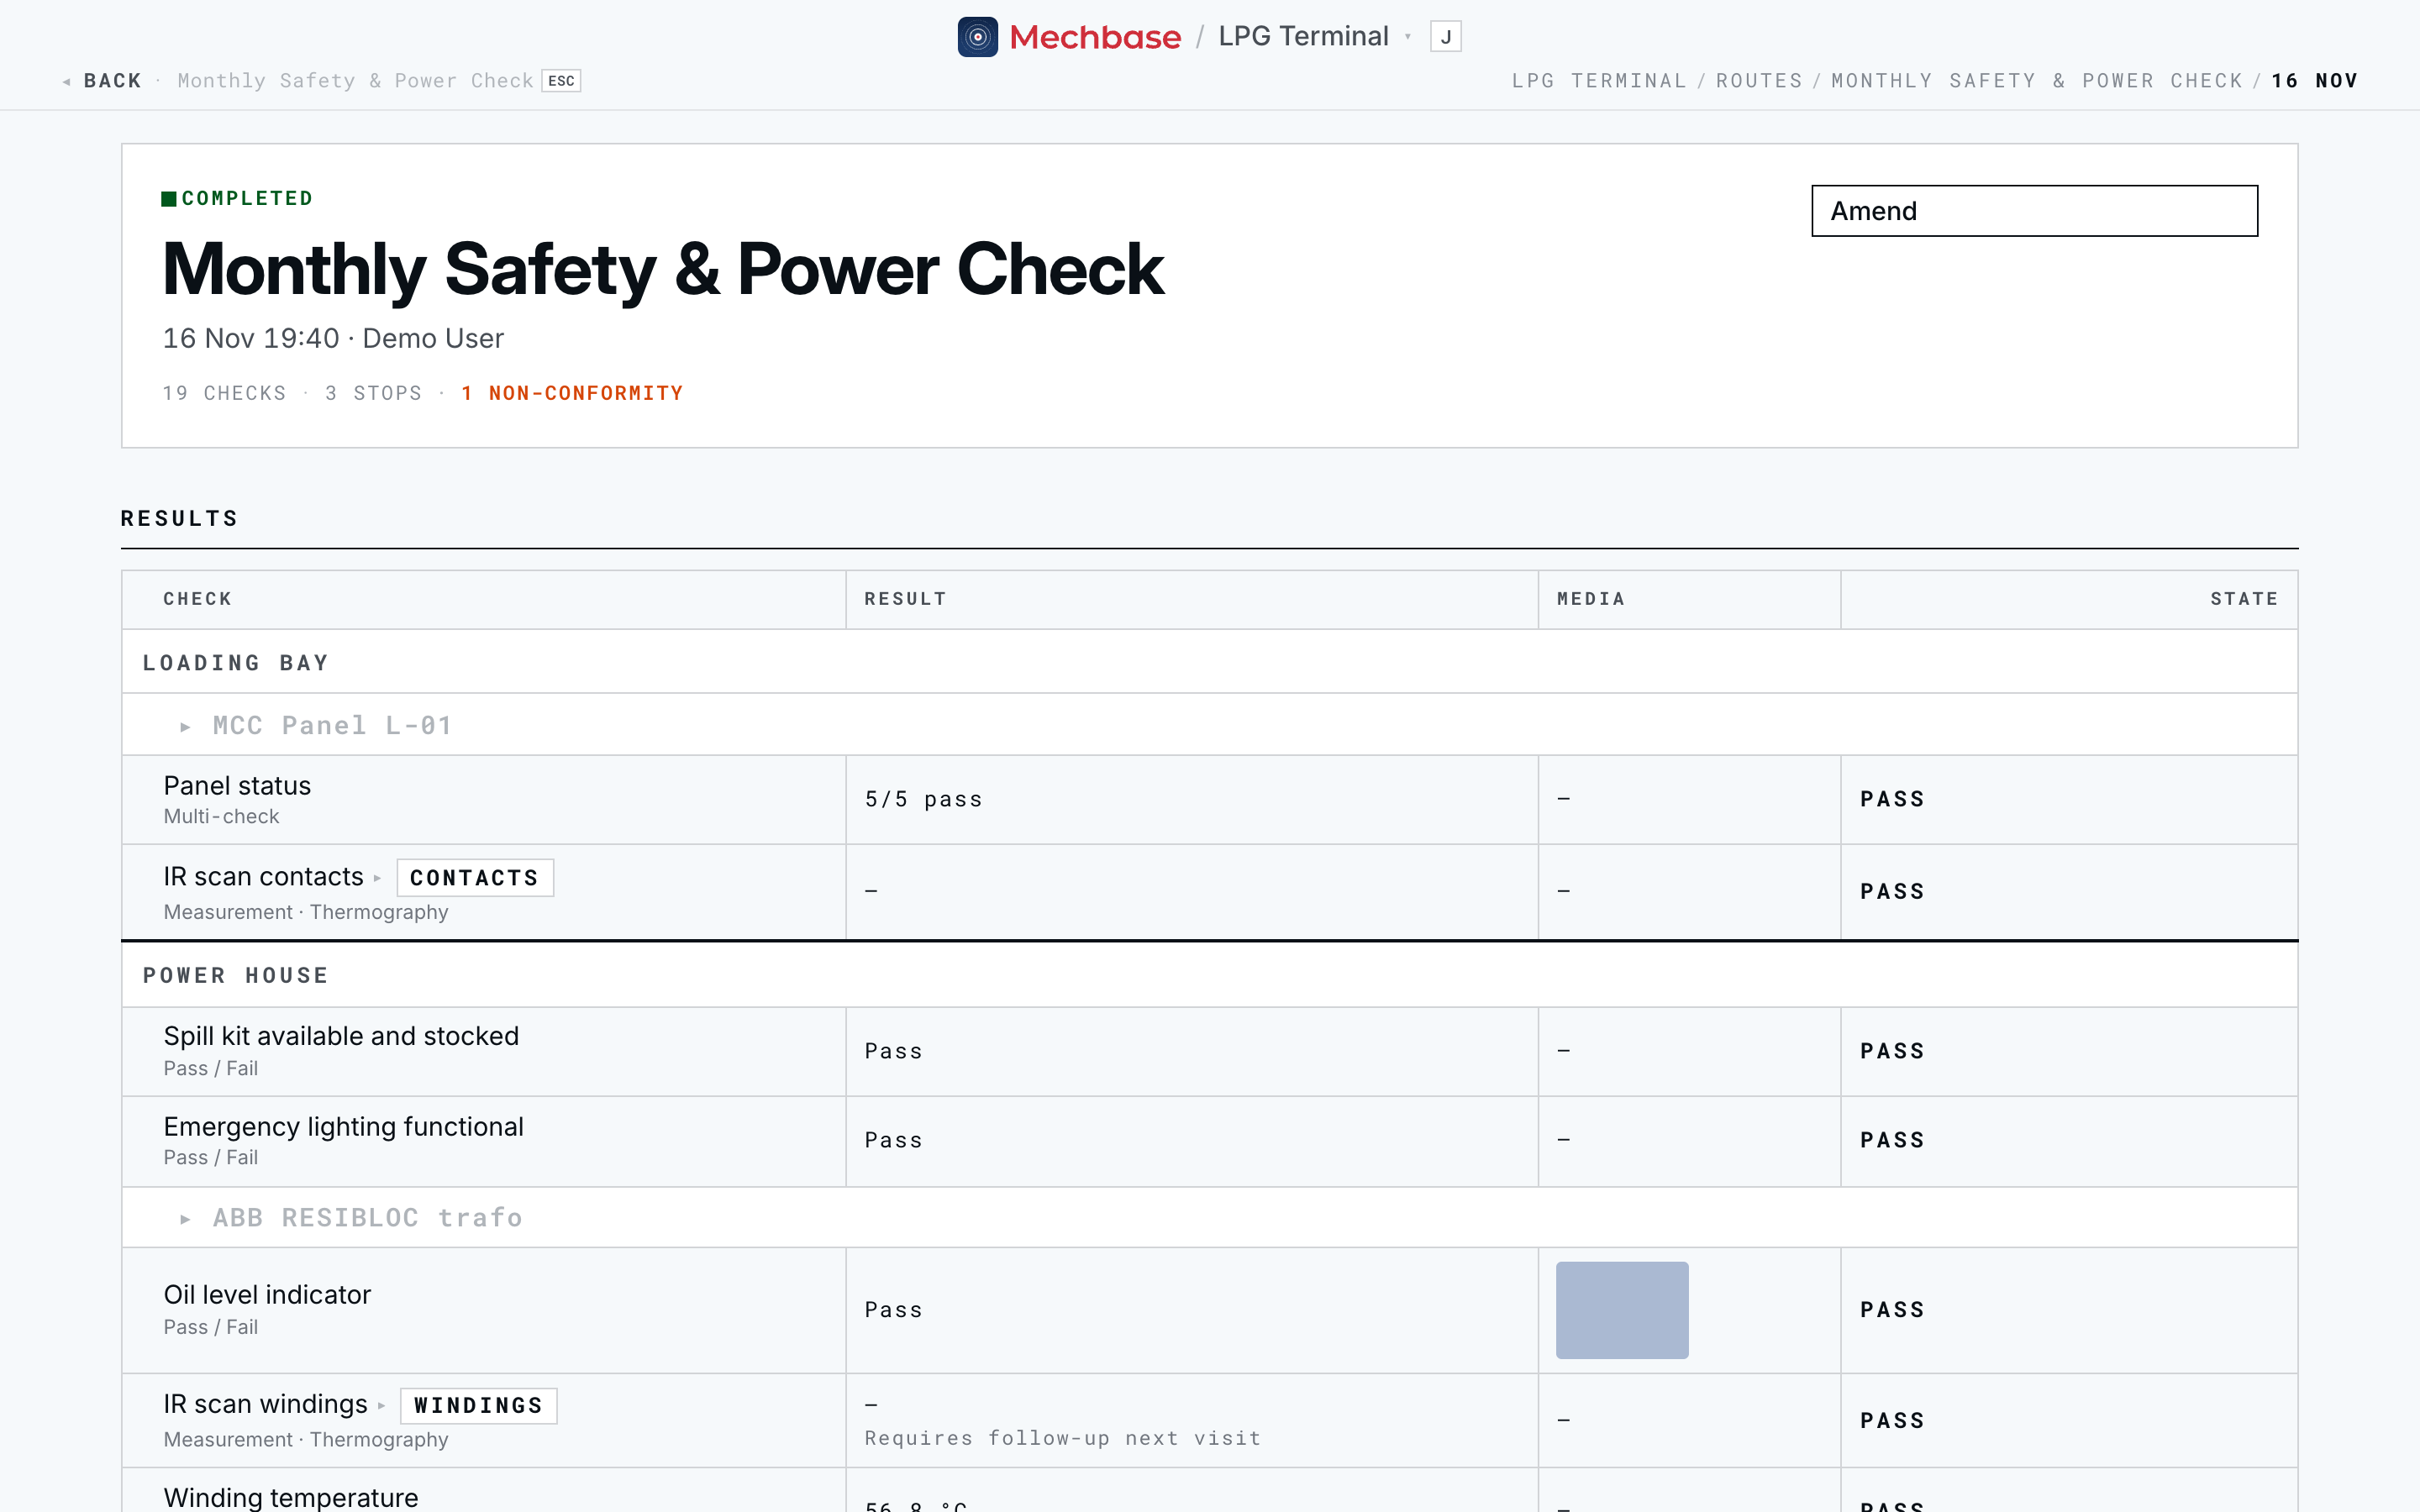
The report records who ran it and when, the totals (checks, stops, and the number of non-conformities), and a Results table — every check with its result, any photos, and its state, grouped by stop and asset. Failed checks are highlighted, so a director skimming the report sees the exceptions immediately. Click a measurement or a failed check to expand it: you get the point’s trend around the run, the previous and current values, and a Finding / Recommended action field you can fill in right there.
Also on the web#
You can also run, review, or tidy up a route in the browser — handy from a desk, or when you’re checking up on a round rather than walking it. Open Routes (or press 2), pick your route, and click Start route (R) — or Resume route if a run is already in progress.
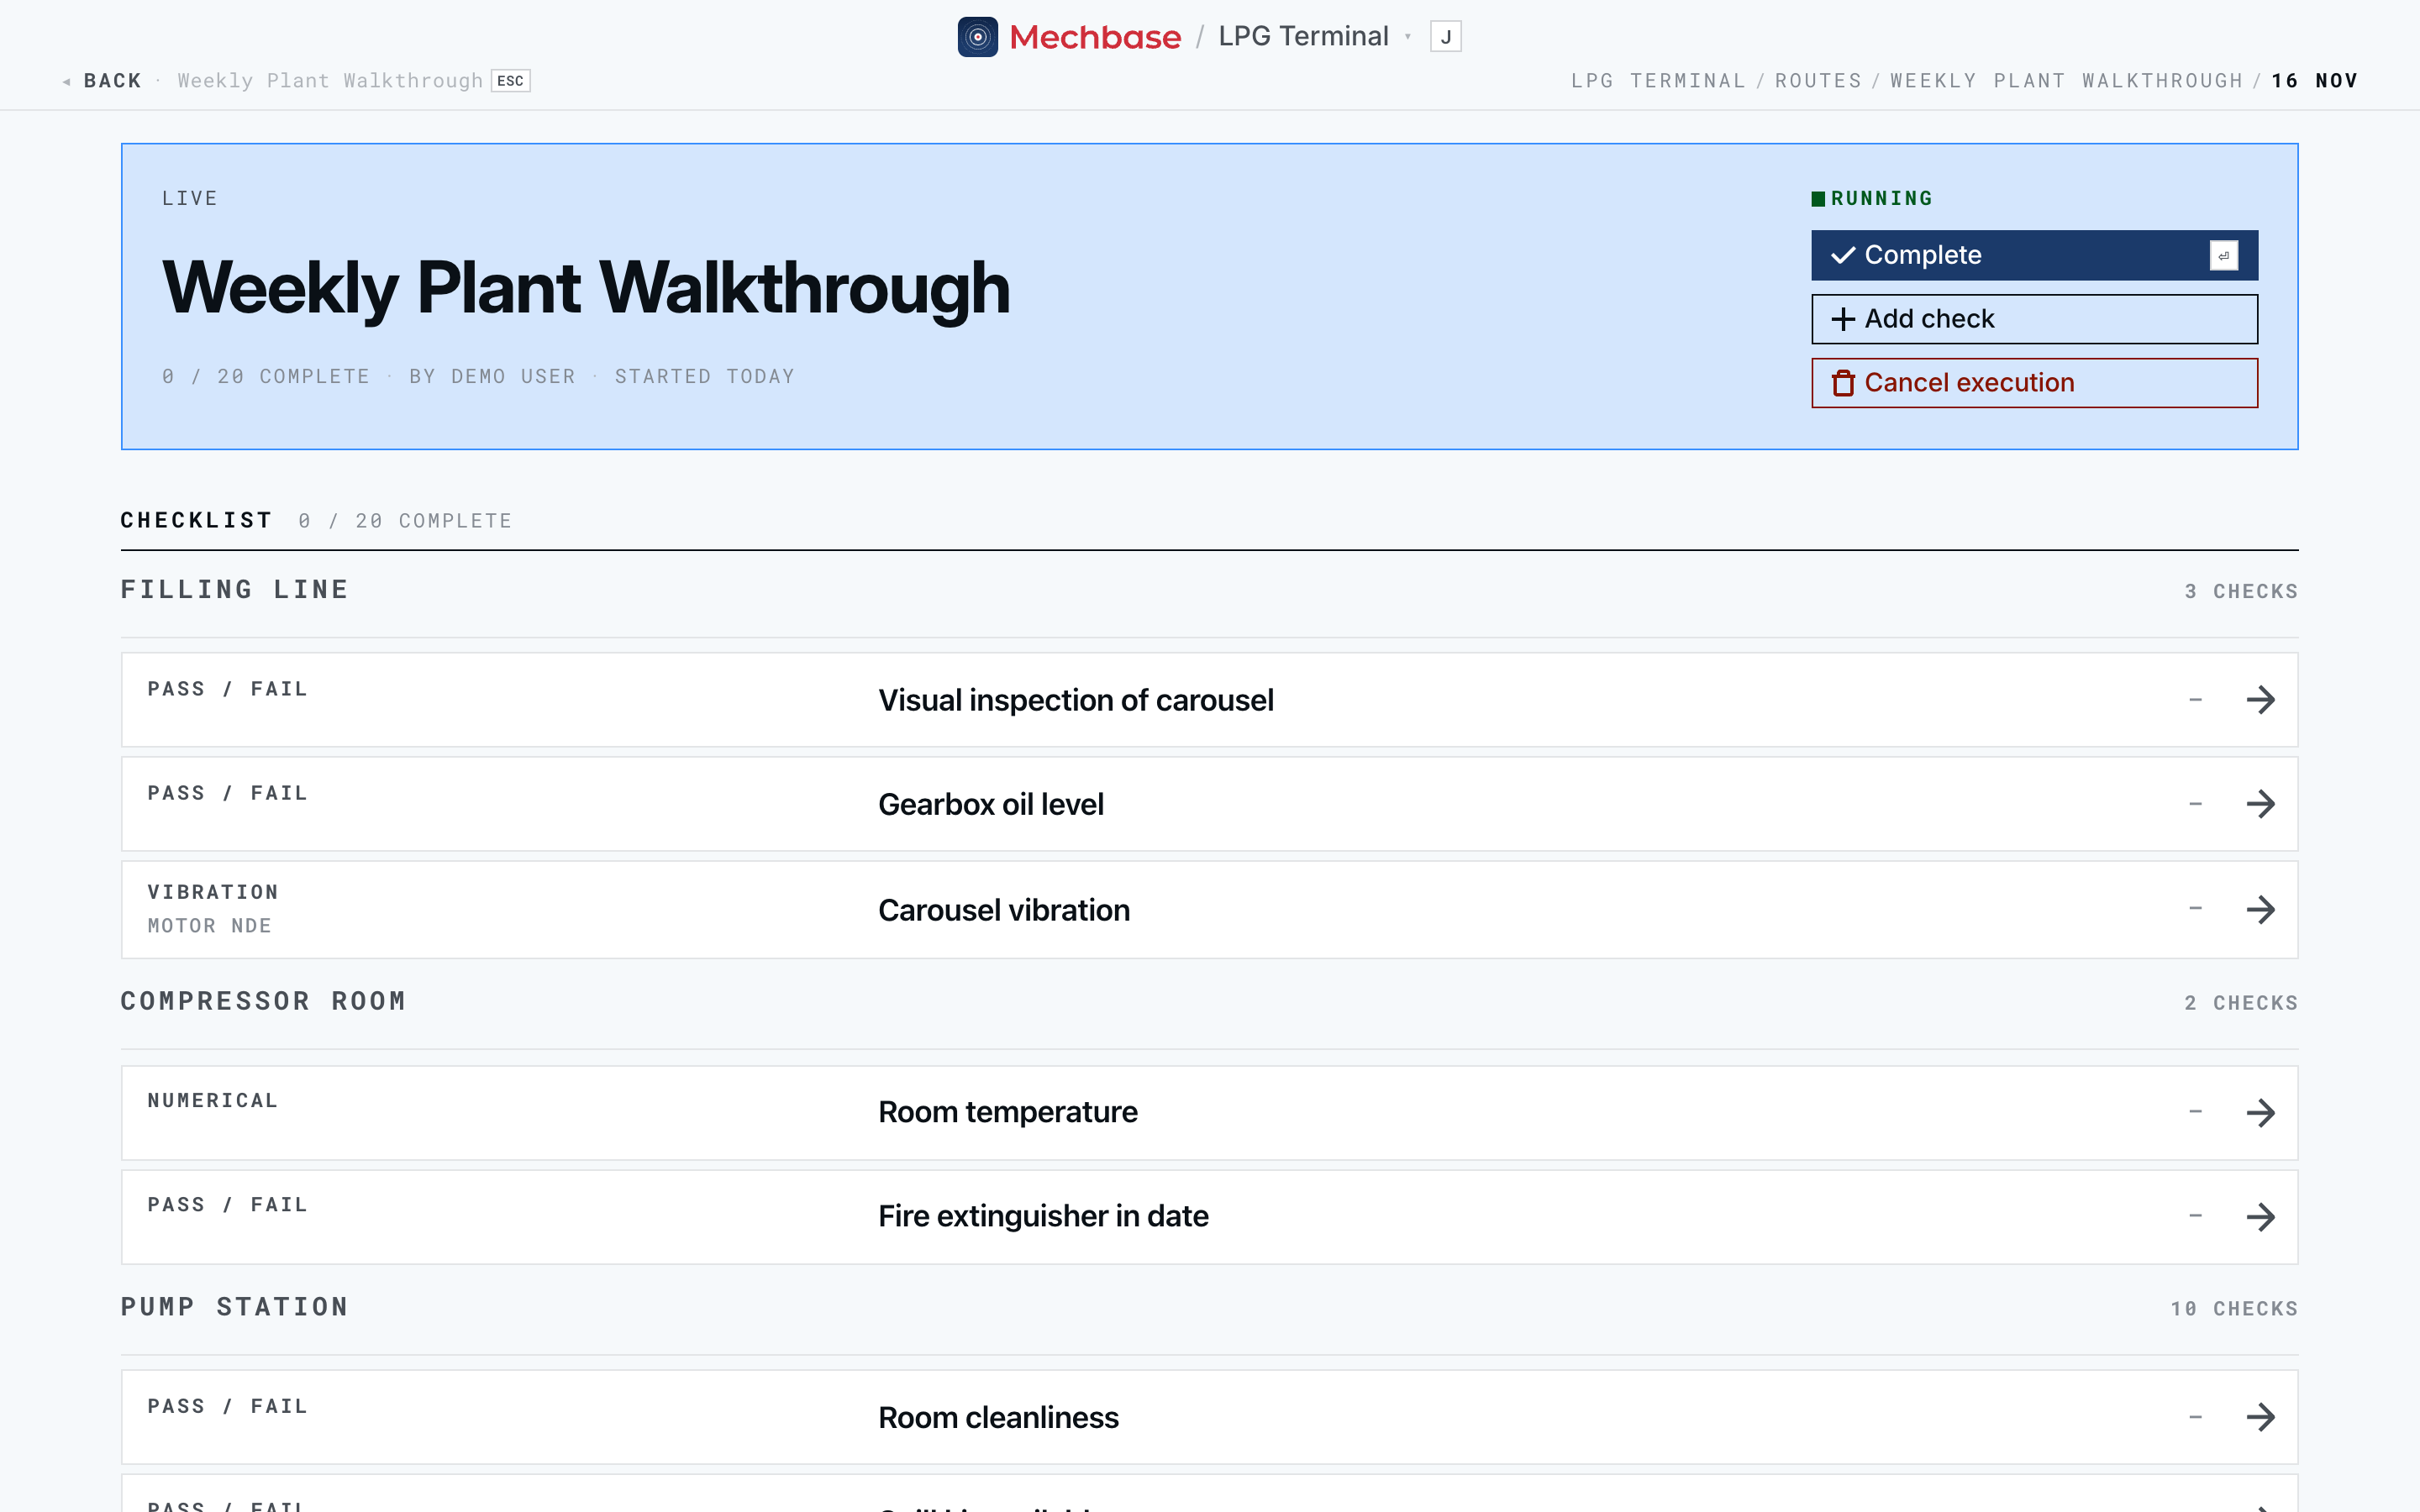
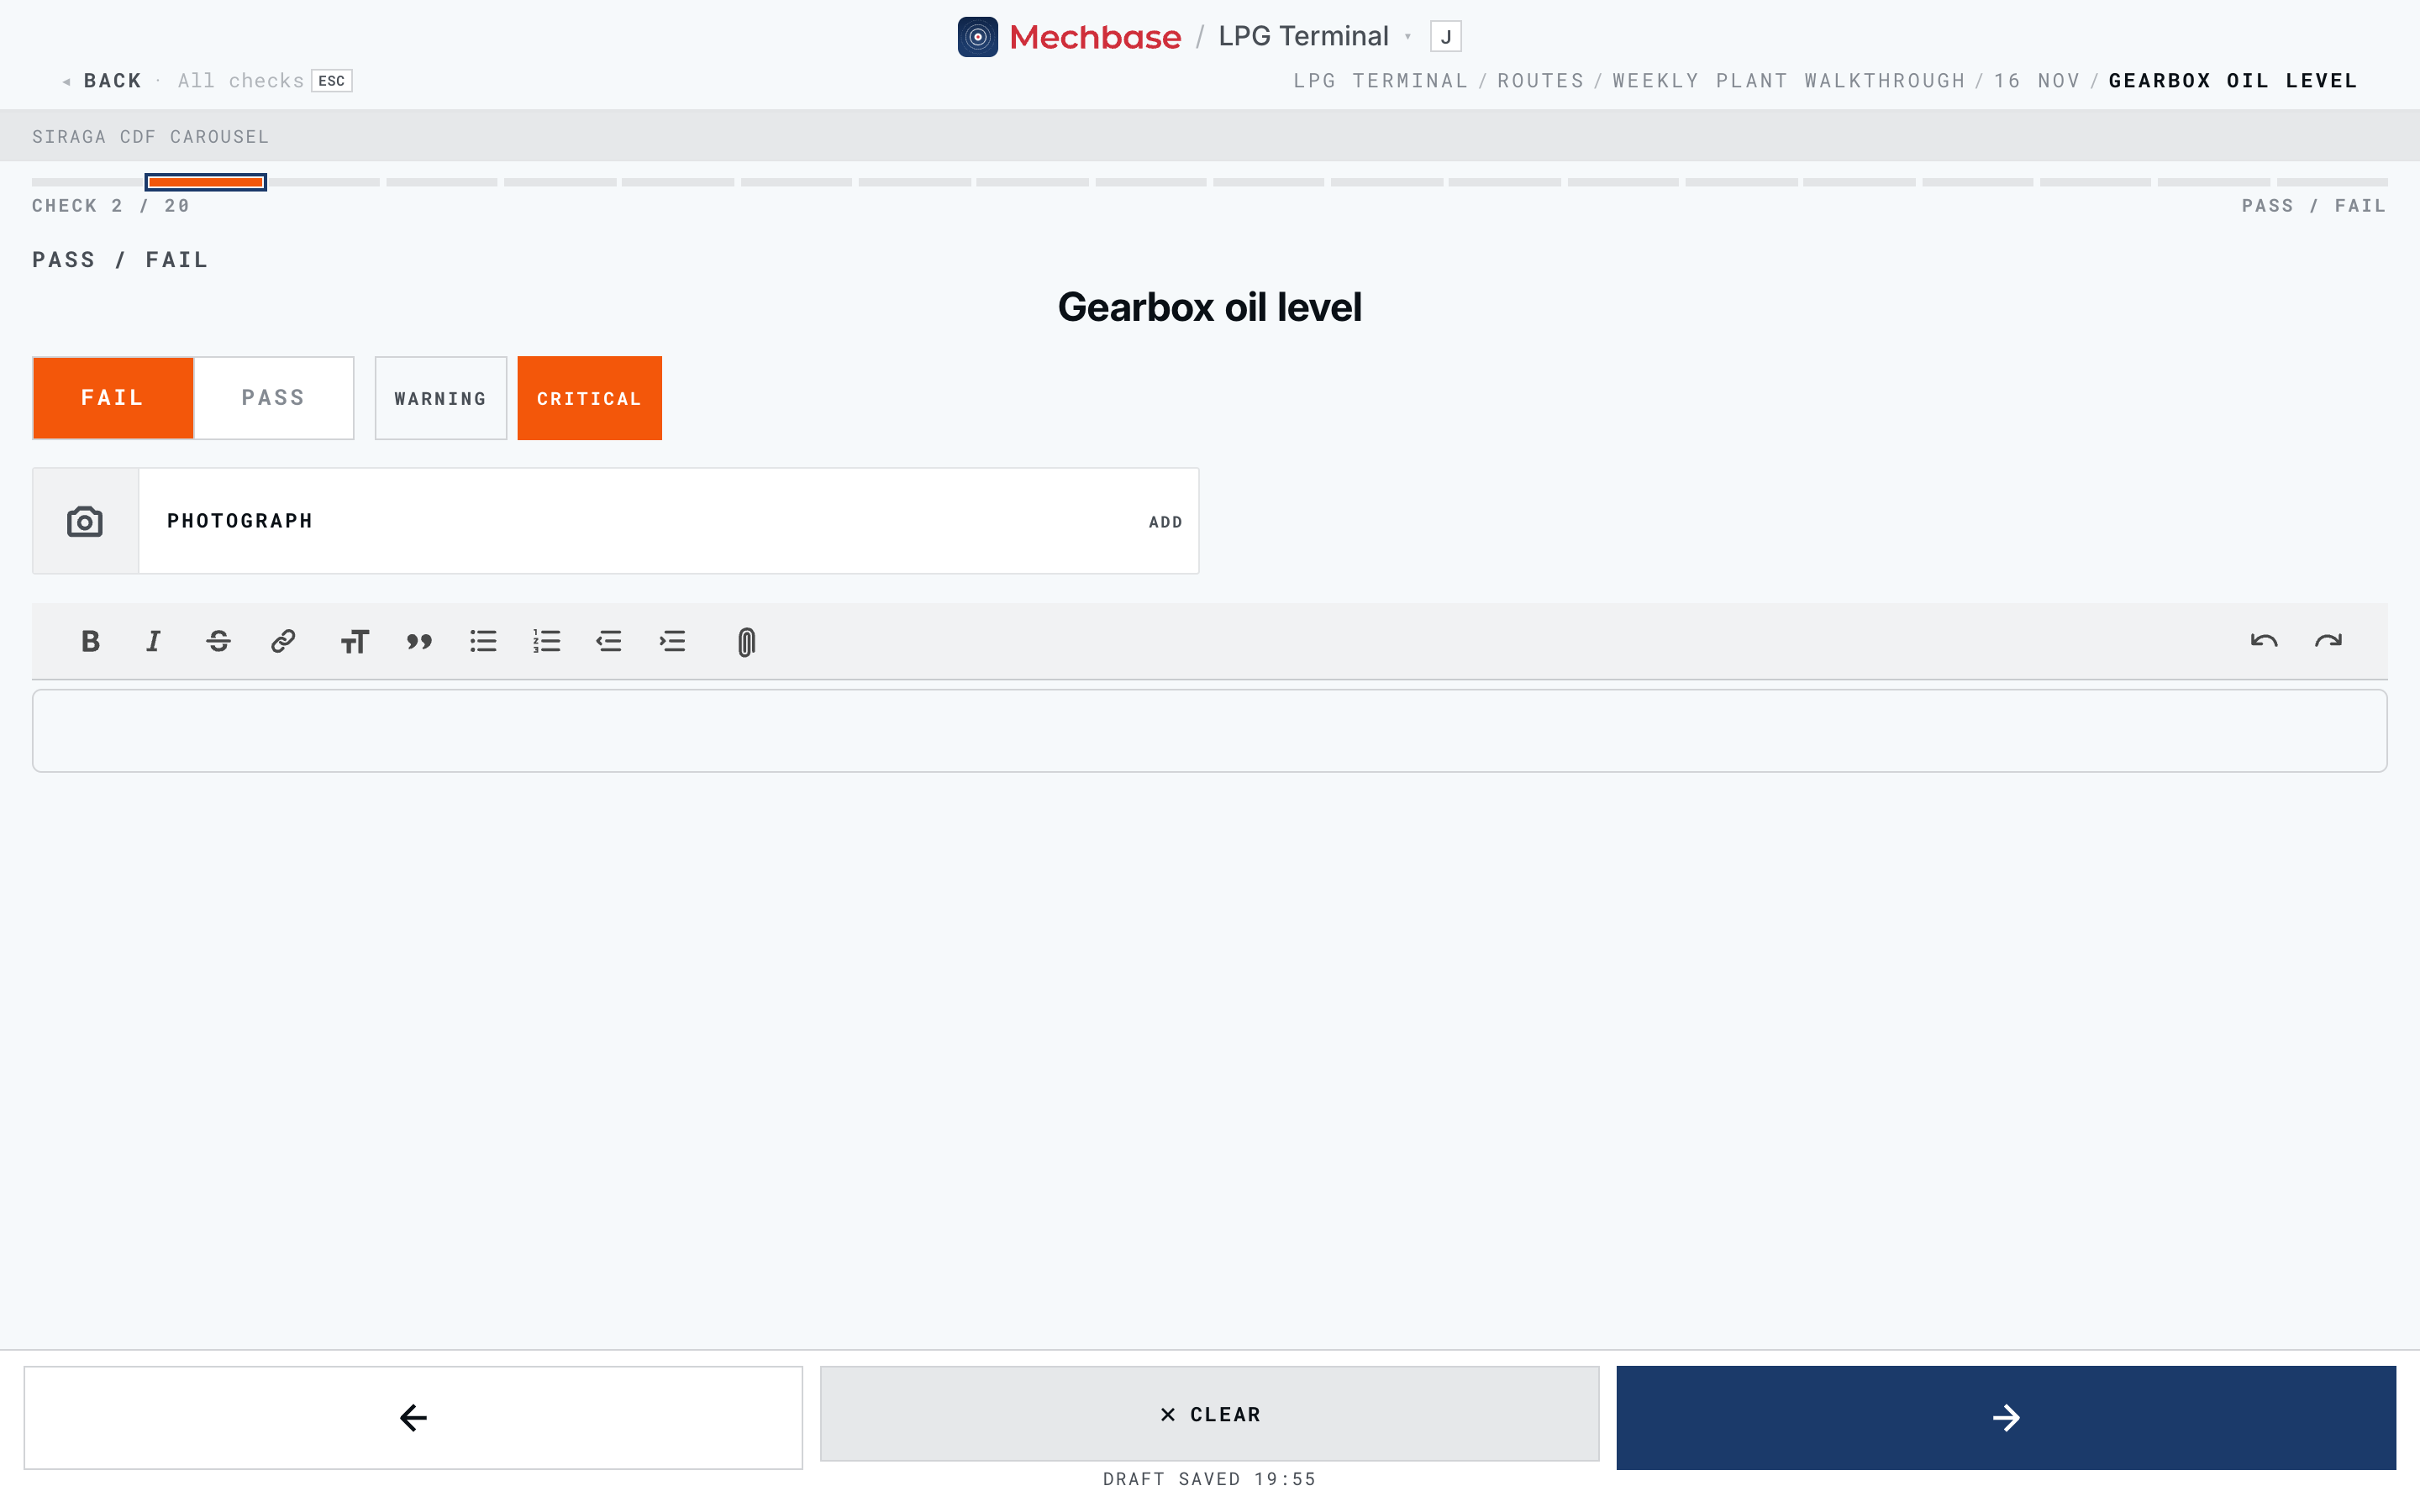
The web run works the same way: open a check, record it, move with the arrows, Clear to undo. A failed check asks for its severity too — Warning or Critical — so grading isn’t limited to the phone. Add check adds something you spotted that isn’t on the list, and Complete finishes the run.
After the run, the web is where you finish the paperwork:
Latest report (
L) opens the report; fill in each row’s Finding / Recommended action.Amend on the report lets the technician who ran it (or a staff user) answer skipped checks, add a reading taken afterwards, or add the photos that were left on the phone. Recorded results stay as they were, and every change is logged.
Print the report from your browser for a paper copy, with every row expanded.
Quick reference#
Step |
On the phone |
|---|---|
Open your route |
Home hub → tap the route (or scan the asset’s QR) |
Start / continue a run |
Open the route — you join a run already in progress |
Move between checks |
the next button, the back arrow, or the progress strip |
Undo one entry |
Clear (then Undo) |
Grade a failed check |
Minor ( |
Finish the run |
✓ at the top of the checklist |
Force a sync |
pull down on the home hub |
Check type |
What you record |
|---|---|
Pass / Fail |
Pass or Fail; grade a fail Minor/Major (phone) or Warning/Critical (web) |
Numerical |
The number off the gauge, judged against its limits |
Multi-check |
Each bundled pass/fail step on its own |
Measurement |
A reading on the point — by hand or from a sensor, including thermal images; flows into its trend |
On the web |
|
|---|---|
Open the routes list |
Routes, or press |
Start / continue a run |
Start route / Resume route ( |
Finish the run |
Complete |
Latest report · past runs |
Latest report ( |
Fill in what was missed |
Amend on the report |